It’s an Aussie Christmas classic – pulling a cracker and donning a paper crown to wear through a long lunch that lingers into the late afternoon under the hot summer sun.
But no matter how beloved they may be, it must be admitted that these flimsy paper constructions, not to mention the other disposable detritus that fills a cracker, are not the most sustainable celebrational accessory.
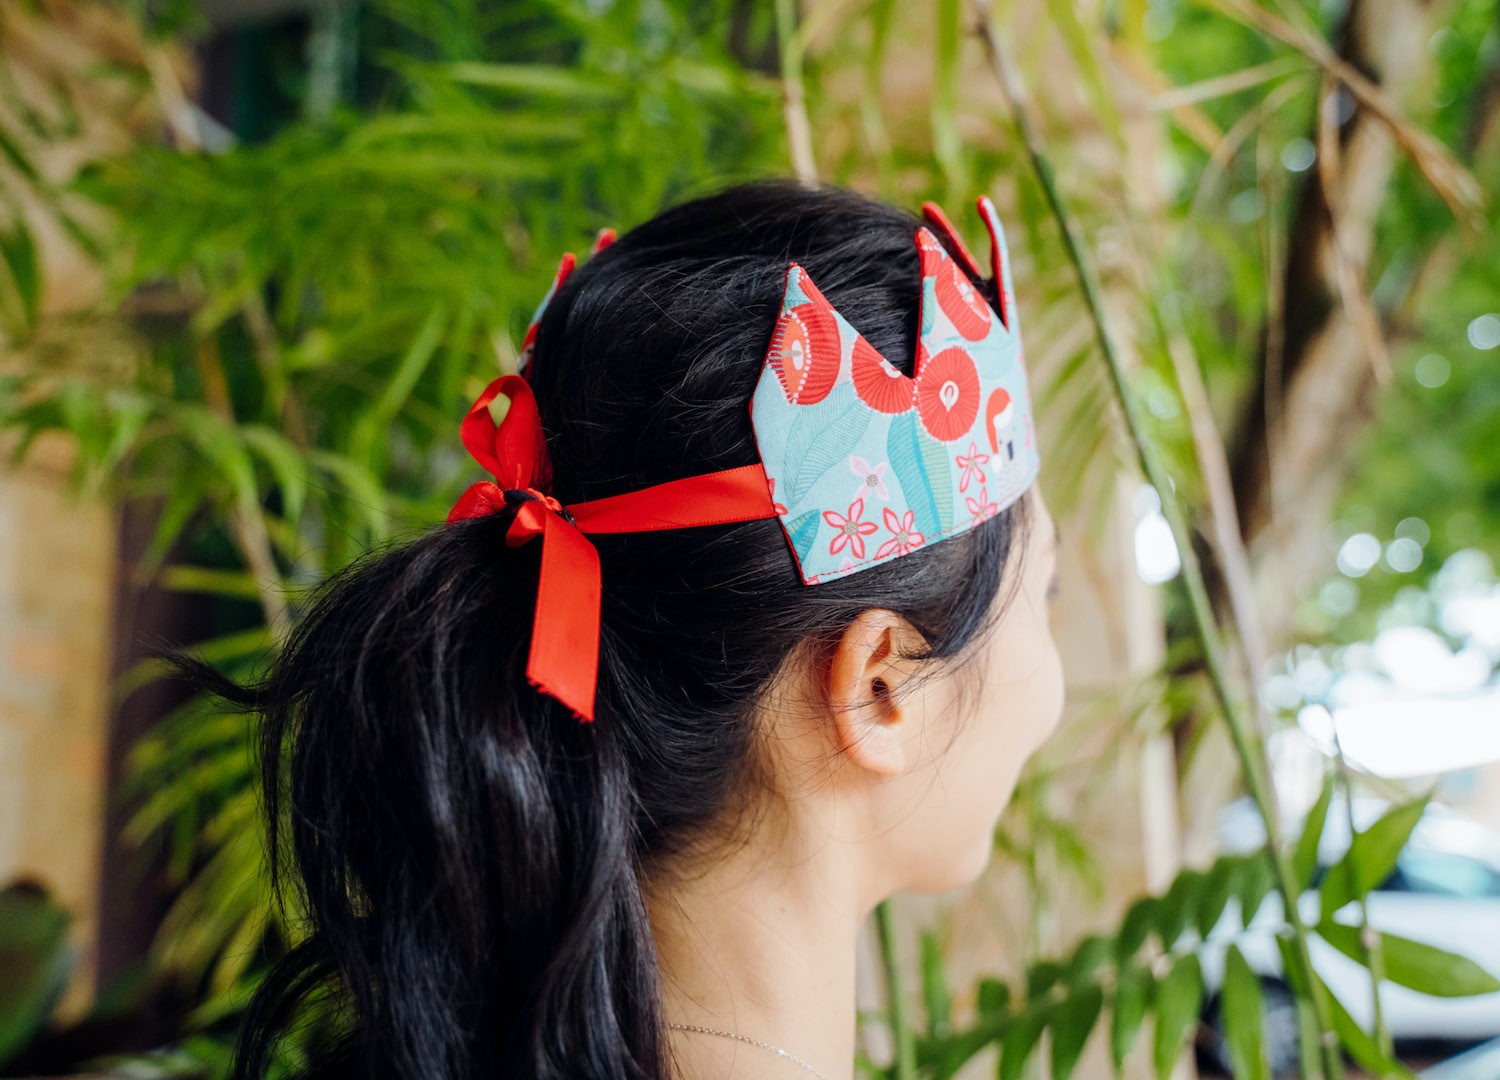
Why not craft a more long-lasting crown? No need to master the art of metal smithing – a little fabric and some ribbon make for a suitably celebratory circlet that can be reworn by you and your loved ones year after year. They can even be used in those barren 11 months that separate Christmas times, for birthdays, fancy dress-ups, or just to add that casual touch to an outfit that says, “Yes, I am a queen.”

But first, why do we wear these anyways?
While this is not an official outing of the sewing detective, we were unable to resist dipping into the history of these hats. Many places will tell you that the paper crown tradition can be traced back to the ancient Romans’ winter solstice festival of Saturnalia, a claim which this sewing sleuth was immediately sceptical of.
Saturnalia was a celebration characterised by unruly behaviour, role reversals and temporary societal upheaval. Their festive headgear of choice was the pileus, a conical felt cap traditionally worn by freedmen. During Saturnalia, Roman citizens, freedmen and slaves alike wore the cap so everyone was “pileated” without distinction.
The syncretising of assorted midwinter celebrations into Christmas traditions is undeniable, yet it seems important to stress that rather than an unbroken lineage of secret “pagan” rituals, most of the modern concept of Christmas stems pretty directly from the reinvention or reimaging of Christmas as a holiday within the Victorian period.
Indeed, the Christmas cracker was invented by candy maker Tom Smith in 1847 and the paper crown was added by his son, Walter Smith, as a way to distinguish their product as competing companies sprung up in the wake of the crackers’ success.
The paper crowns themselves were possibly inspired by epiphany cakes in Europe, especially France, which are often served with a paper crown on top.
Epiphany is not part of your classic Aussie Christmas, though it is celebrated in various ways across the world on or about 6 January. It is the twelfth day of Christmas and marks the arrival of the Magi, the Three Wise Men or Kings, to Bethlehem. It is often celebrated with a cake that contains a fève – a bean, charm, or tiny plastic figurine of baby Jesus hidden inside. Whoever finds the fève in their slice is crowned king or queen with the paper crown and is either believed to have good luck for the rest of the year or saddled with the bad luck of paying for the cake.
Does this tradition echo the social reversal typical of Saturnalia? Kind of. Would we call this a direct line from pileus caps to paper crowns in our crackers? Meh. The sewing detective’s final word on the topic is simply, once again, that everyone should read Terry Pratchett’s The Hogfather.
INSTRUCTIONS
Now you’ve been forced to learn some history (or perhaps you joyously skipped the above) you can have some arts and crafts.
This is quite a simple and speedy DIY that can easily be made with scraps on hand, or you can splurge on some festive fabric and make a matching set for your family.
THINGS YOU’LL NEED (makes one crown)
0.5 metres of woven fabric – make your crown reversible by using two different fabrics or the same on both sides!
0.5 metres of iron-on interfacing
60cm of ribbon
Sewing machine
Ruler
Point turning implement
Fabric marker/pencil
Scissors
Pins
Iron
Scissors
Sewing machine and associated accoutrement
DOWNLOAD THE TEMPLATE
STEP ONE // Print and cut out the provided template or freehand your own if you want to change the size significantly – because of the ribbon closures at the back, the template can be adjusted to fit most head sizes. The crown template is a rectangle 40cm long and 4cm high topped with 8 triangles with a base 5cm wide and a height of 4cm.

STEP TWO // Use the template (on fold, or simply flip to mirror) to cut out some iron-on interfacing.
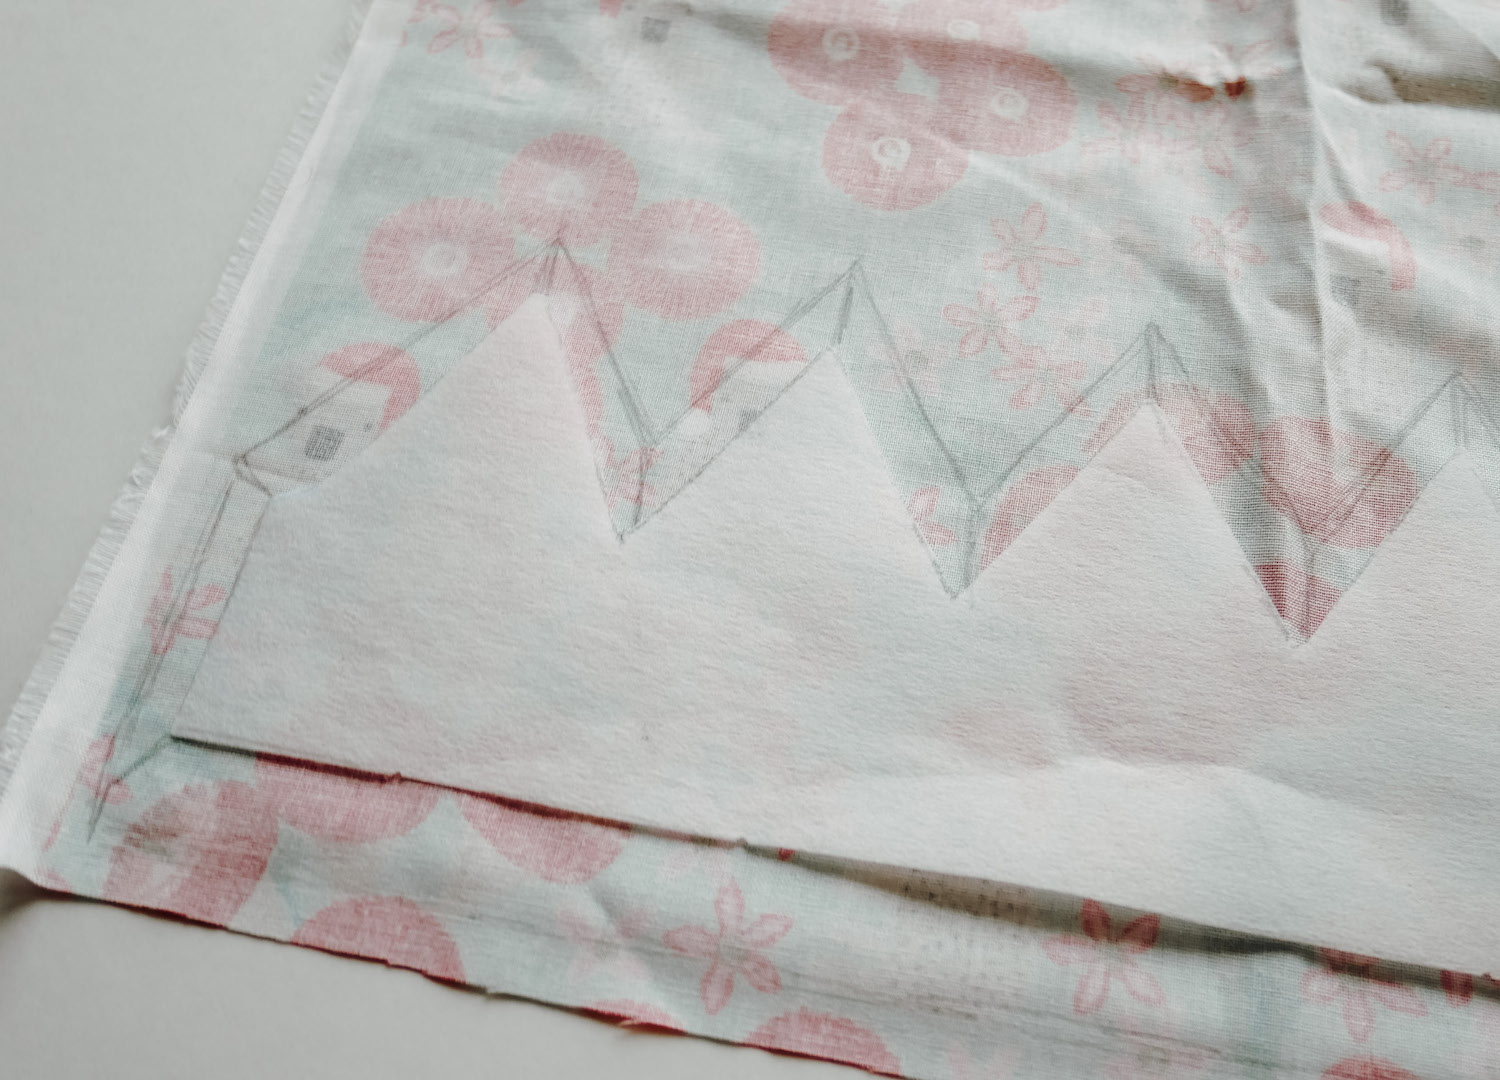
STEP THREE // Use interfacing to cut out your two pieces of fabric, except cut them with an added 1cm seam allowance around all sides.
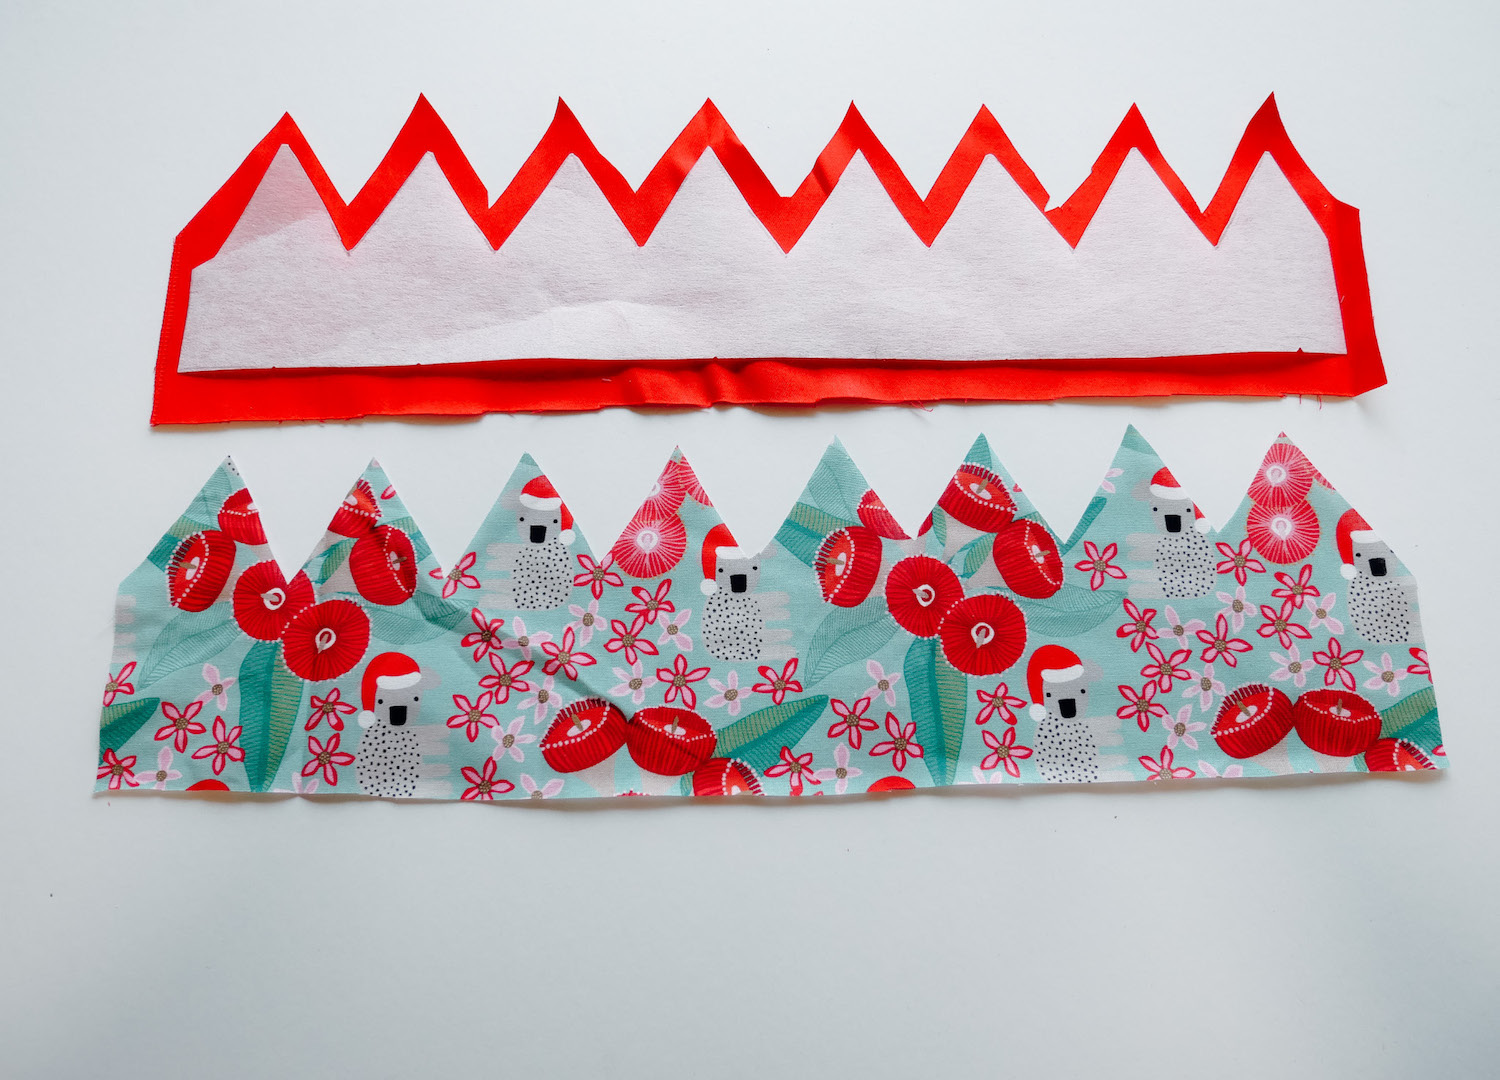
STEP FOUR // Iron on the interfacing to the wrong side of one of your fabric pieces. Press the bottom flat edge of both crown pieces up 0.5cm towards the wrong sides of the fabric.
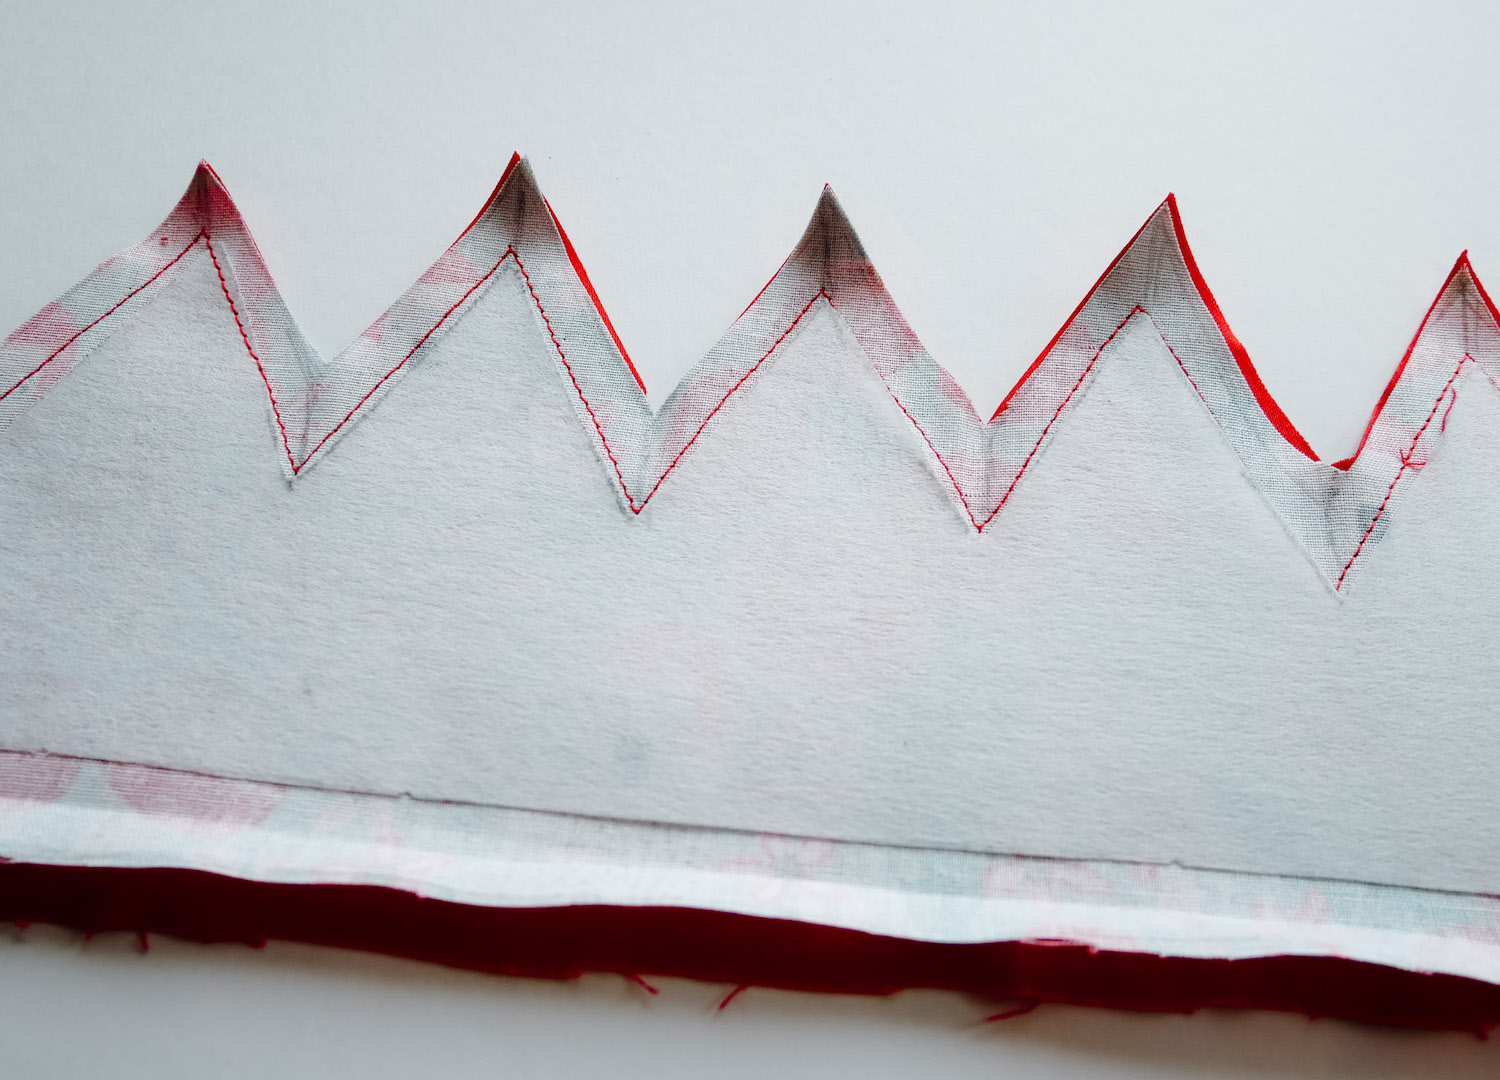
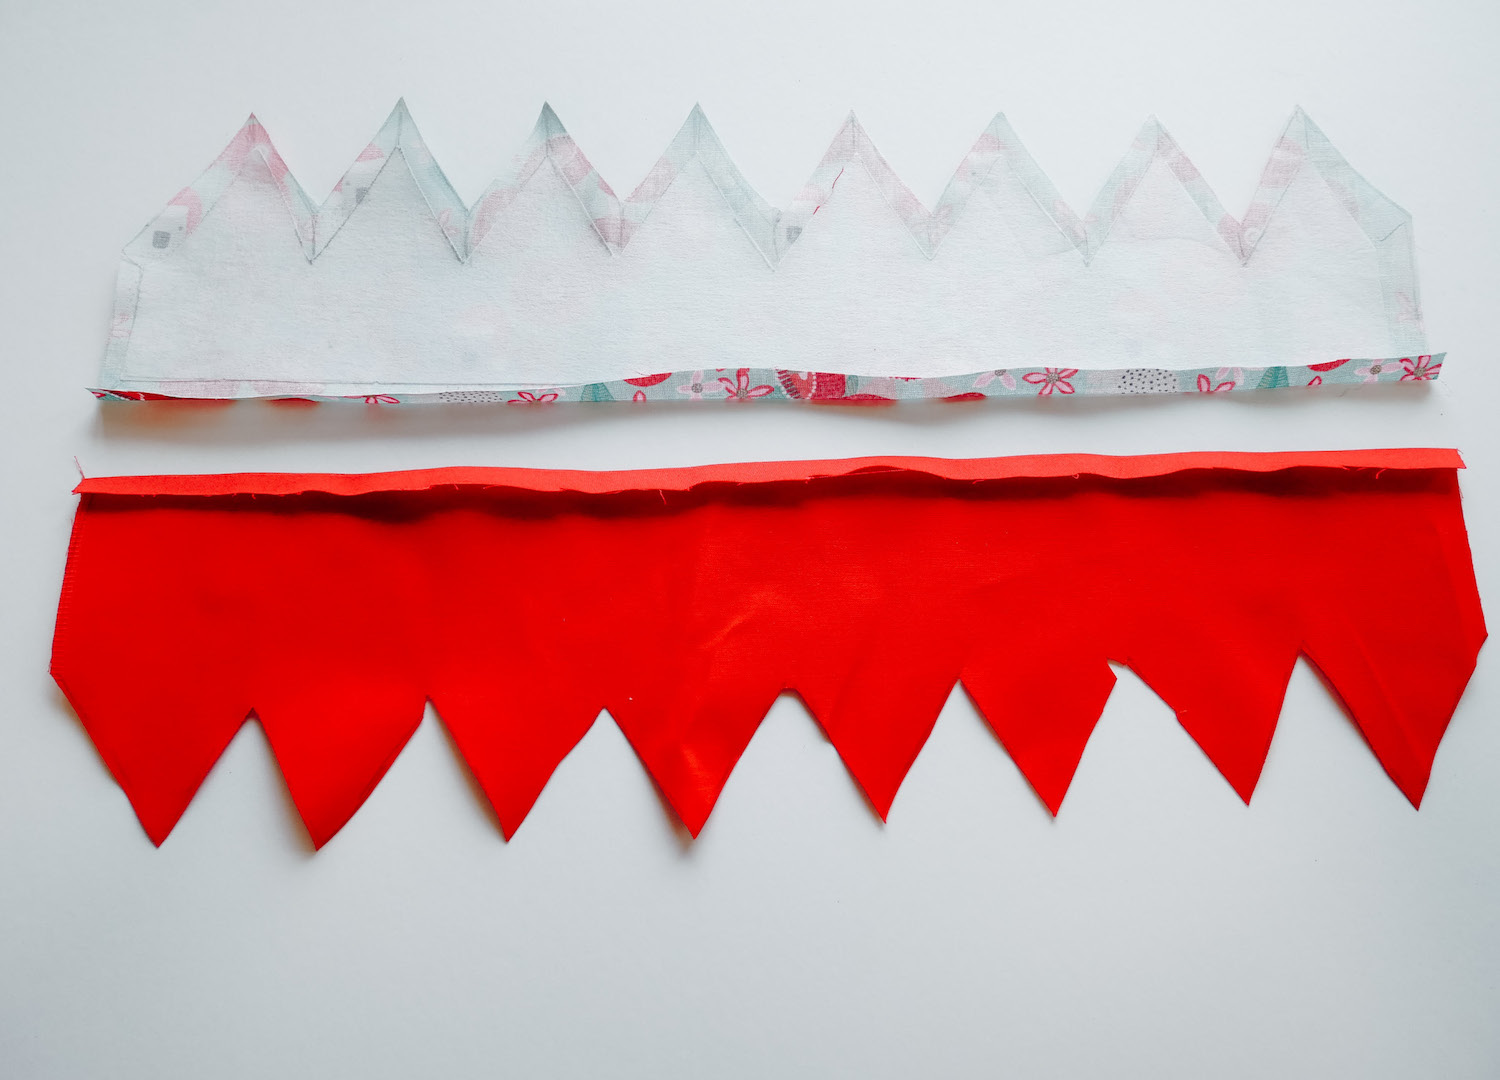
STEP FIVE // Place the two pieces of fabric wrong sides together and stitch together along the top, zig-zagged edge with a seam allowance of approximately 1cm.

STEP SIX // Trim seam allowances, clipping in particularly at the top and bottom of the triangles.
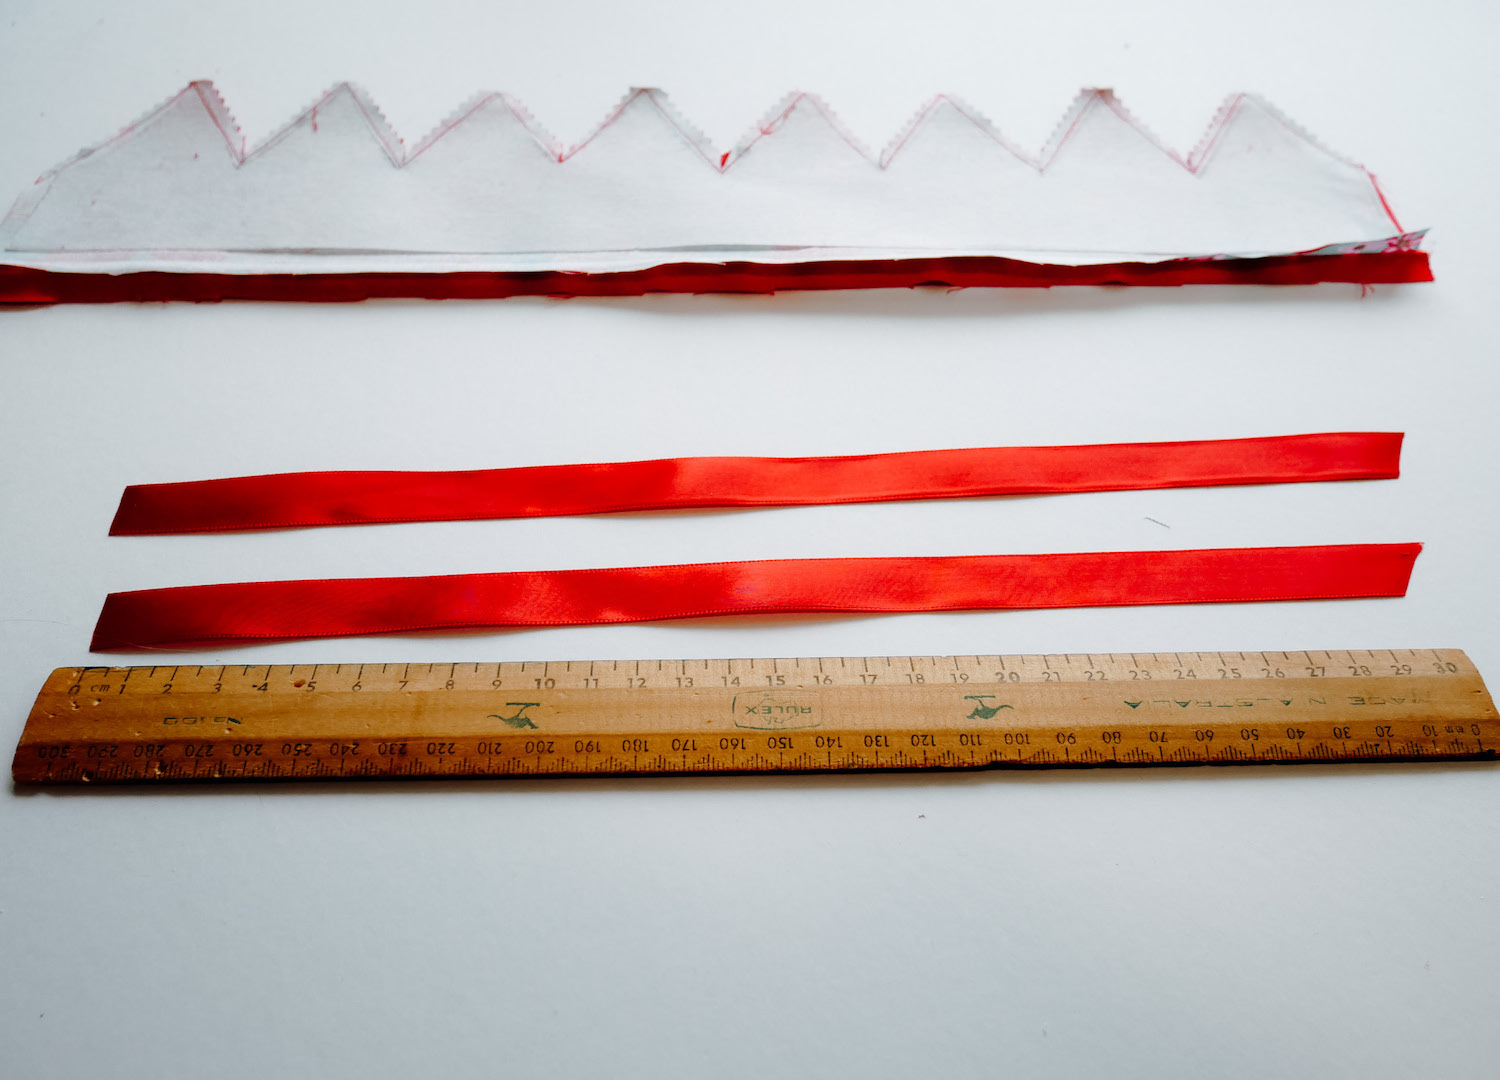
STEP SEVEN // Measure and cut 2 lengths of ribbon approximately 30cm long.

STEP EIGHT // Insert the ribbons into the crown so that the short length pokes through the open edges of the crown. Sew down along the sides.
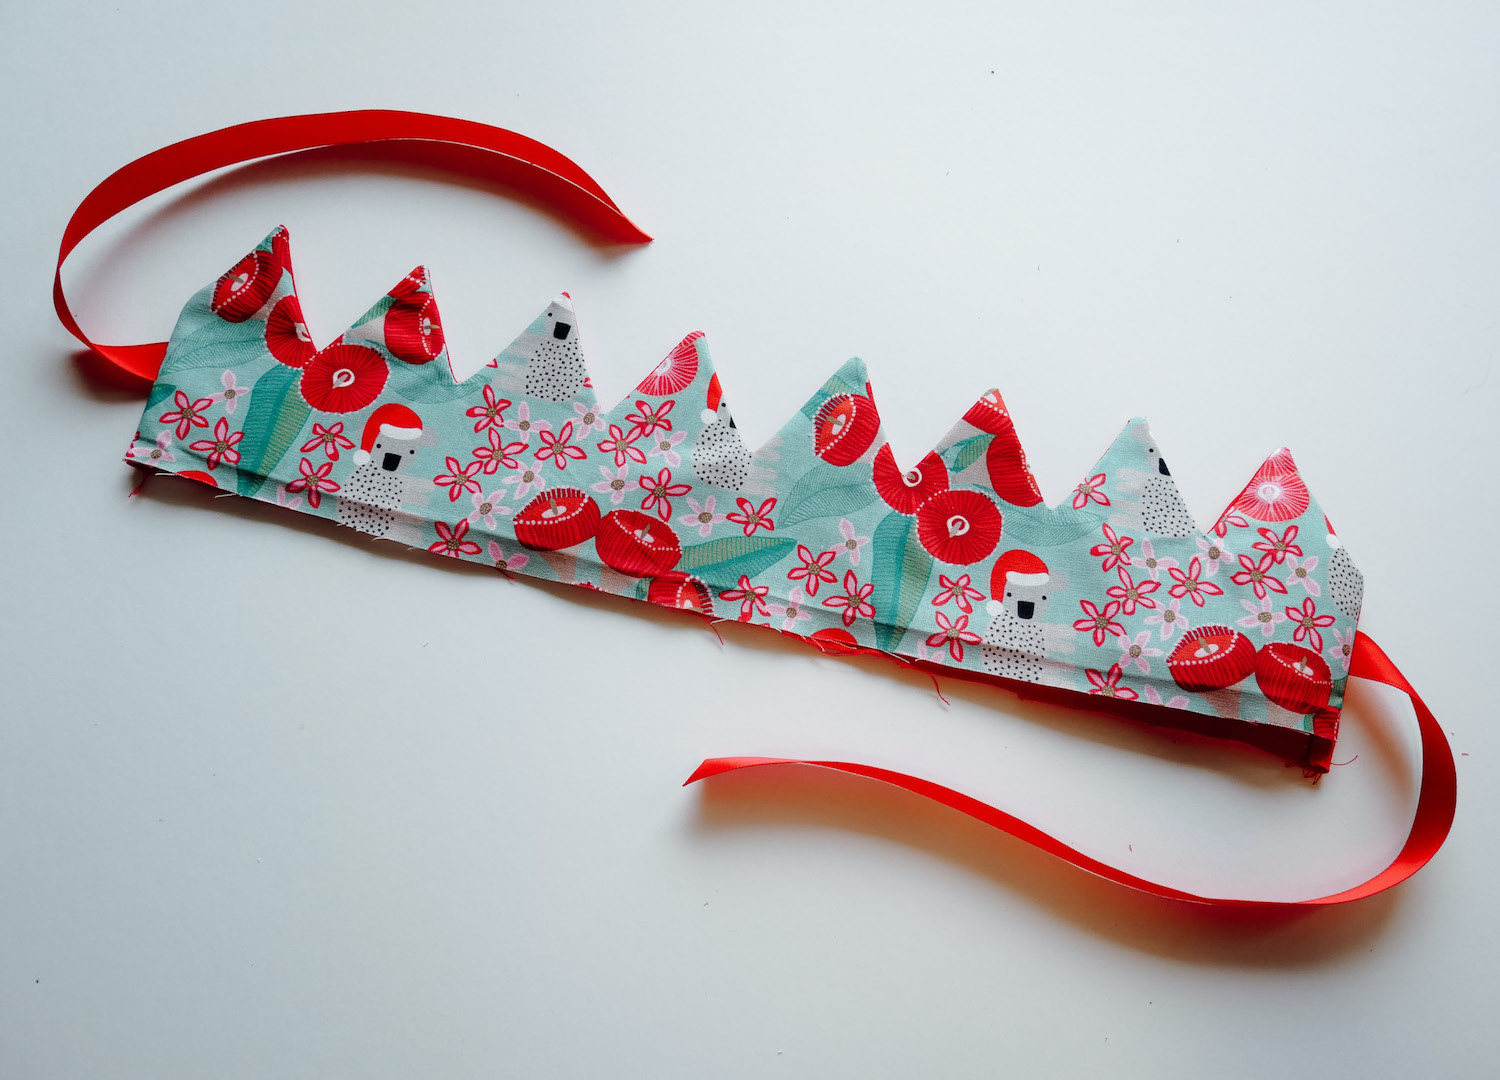
STEP NINE // Flip the crown right sides out. Take your time carefully poking out the points with a chopstick or the handle of a paintbrush (or a proper point turner if you’re fancy) so they stand nice and crisp.

STEP TEN // Align folded bottom edges together neatly and top stitch closed.
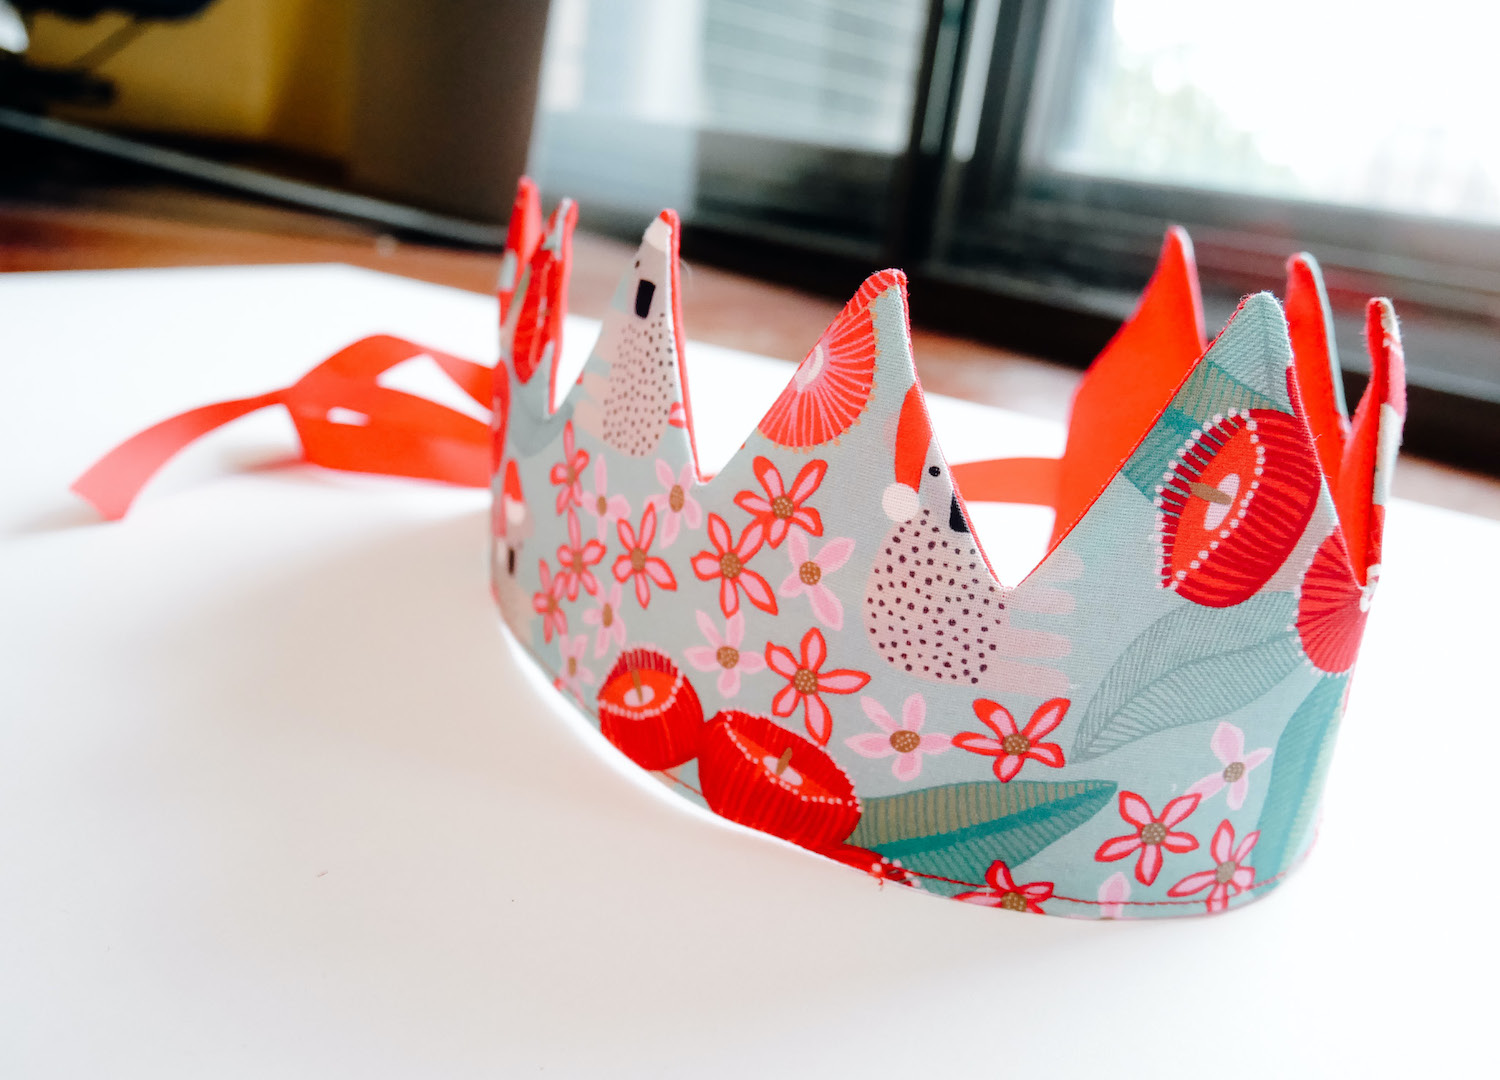
Ta-da – you have a beautiful fabric crown! Perform a quick coronation and get ready to jingle bell rock this Christmas!

words process photos and pattern by BONNIE LISTON