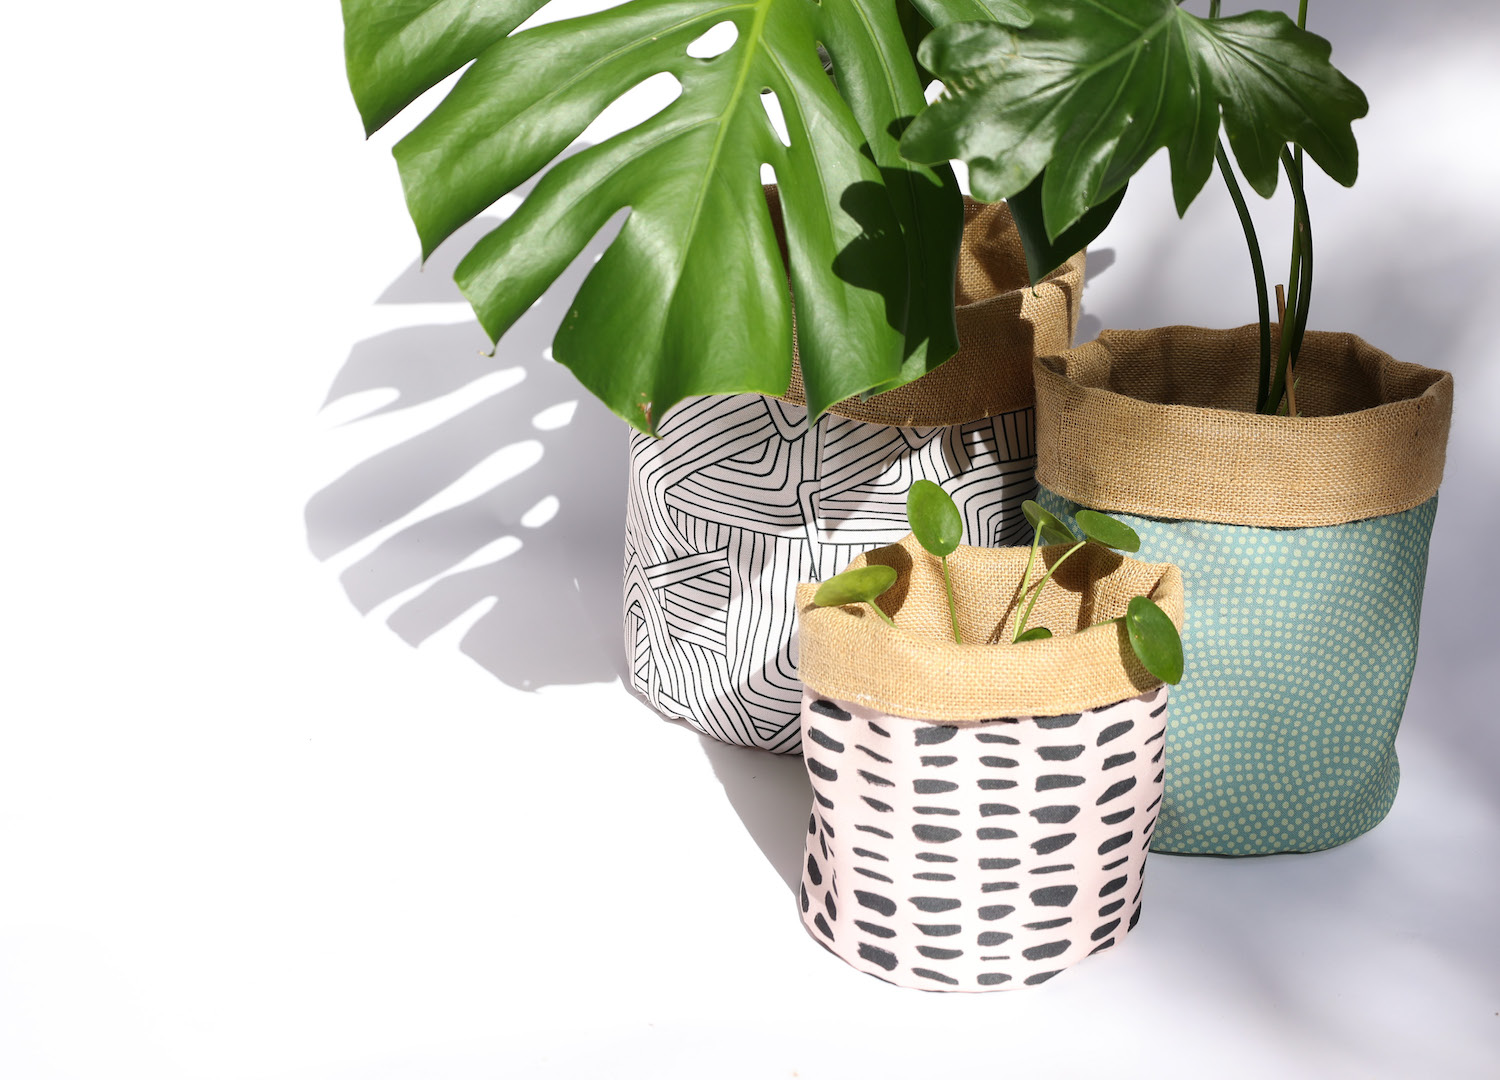
We’re not the first to sing the praises of plants, nor the benefits of getting crafty with your hands, but hear this stitchy pals: sewing up cosy, colourful fabric homes for your houseplants might just be the best of both worlds! Not only are these DIY fabric planters quick and easy to sew, they’re reversible, washable and the perfect scrap-busting project. They also make rather excellent gifts for your plant-loving pals. But who are we kidding… you’ll probably want to keep them for yourself.
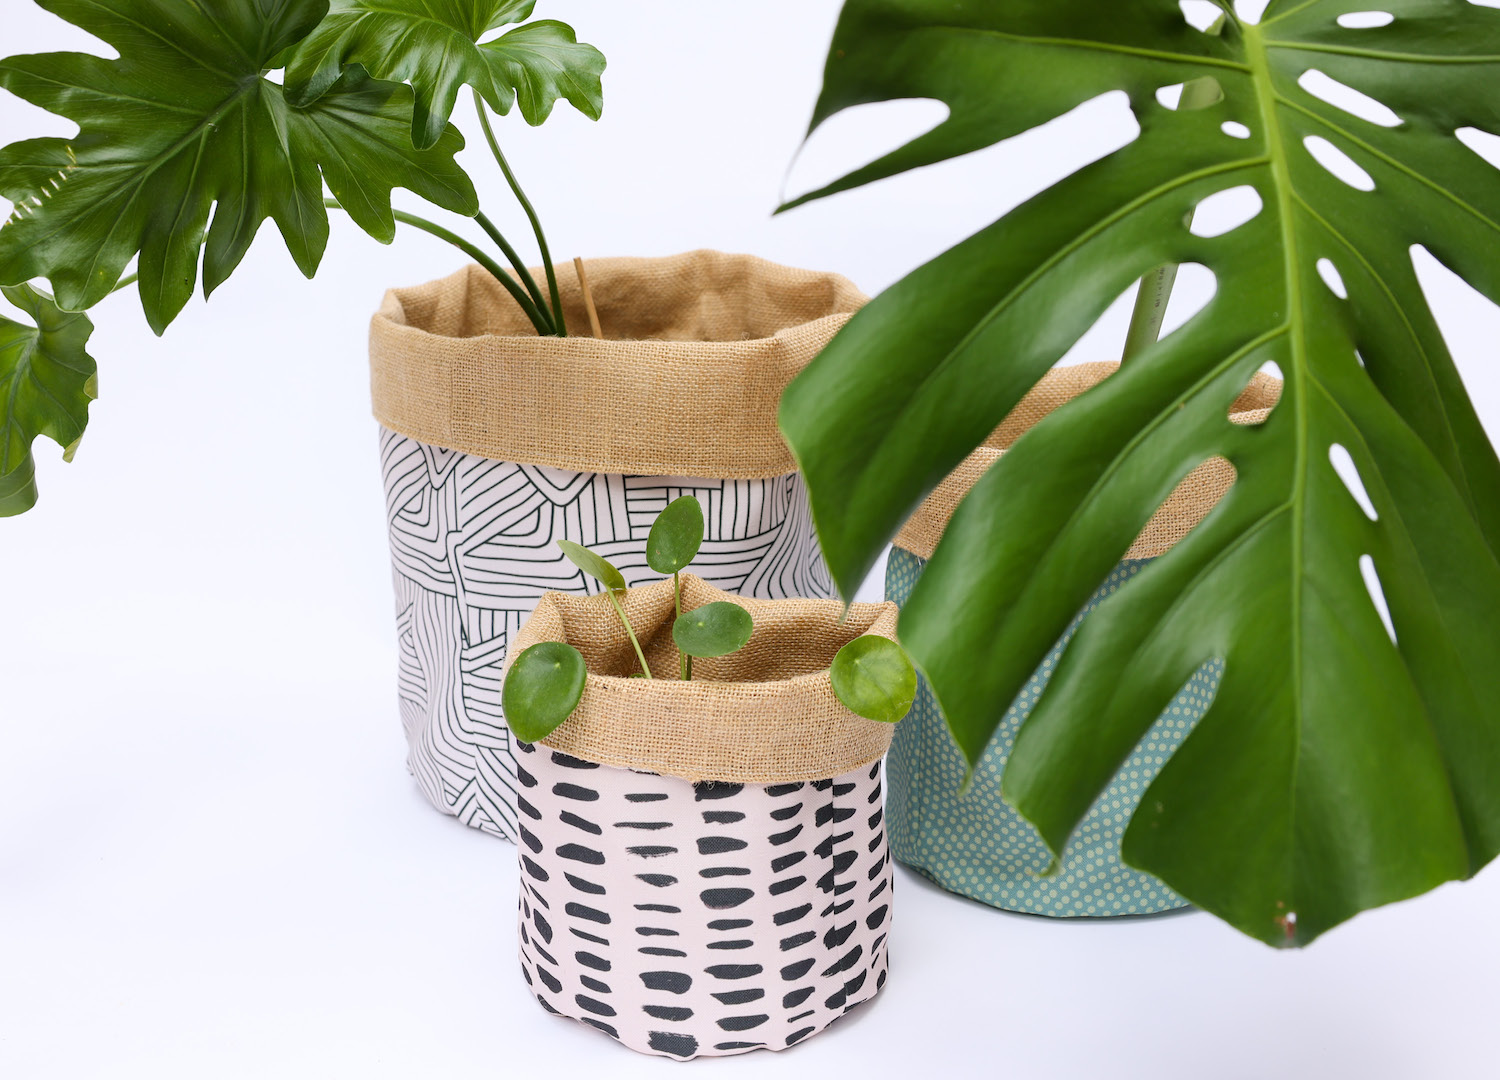
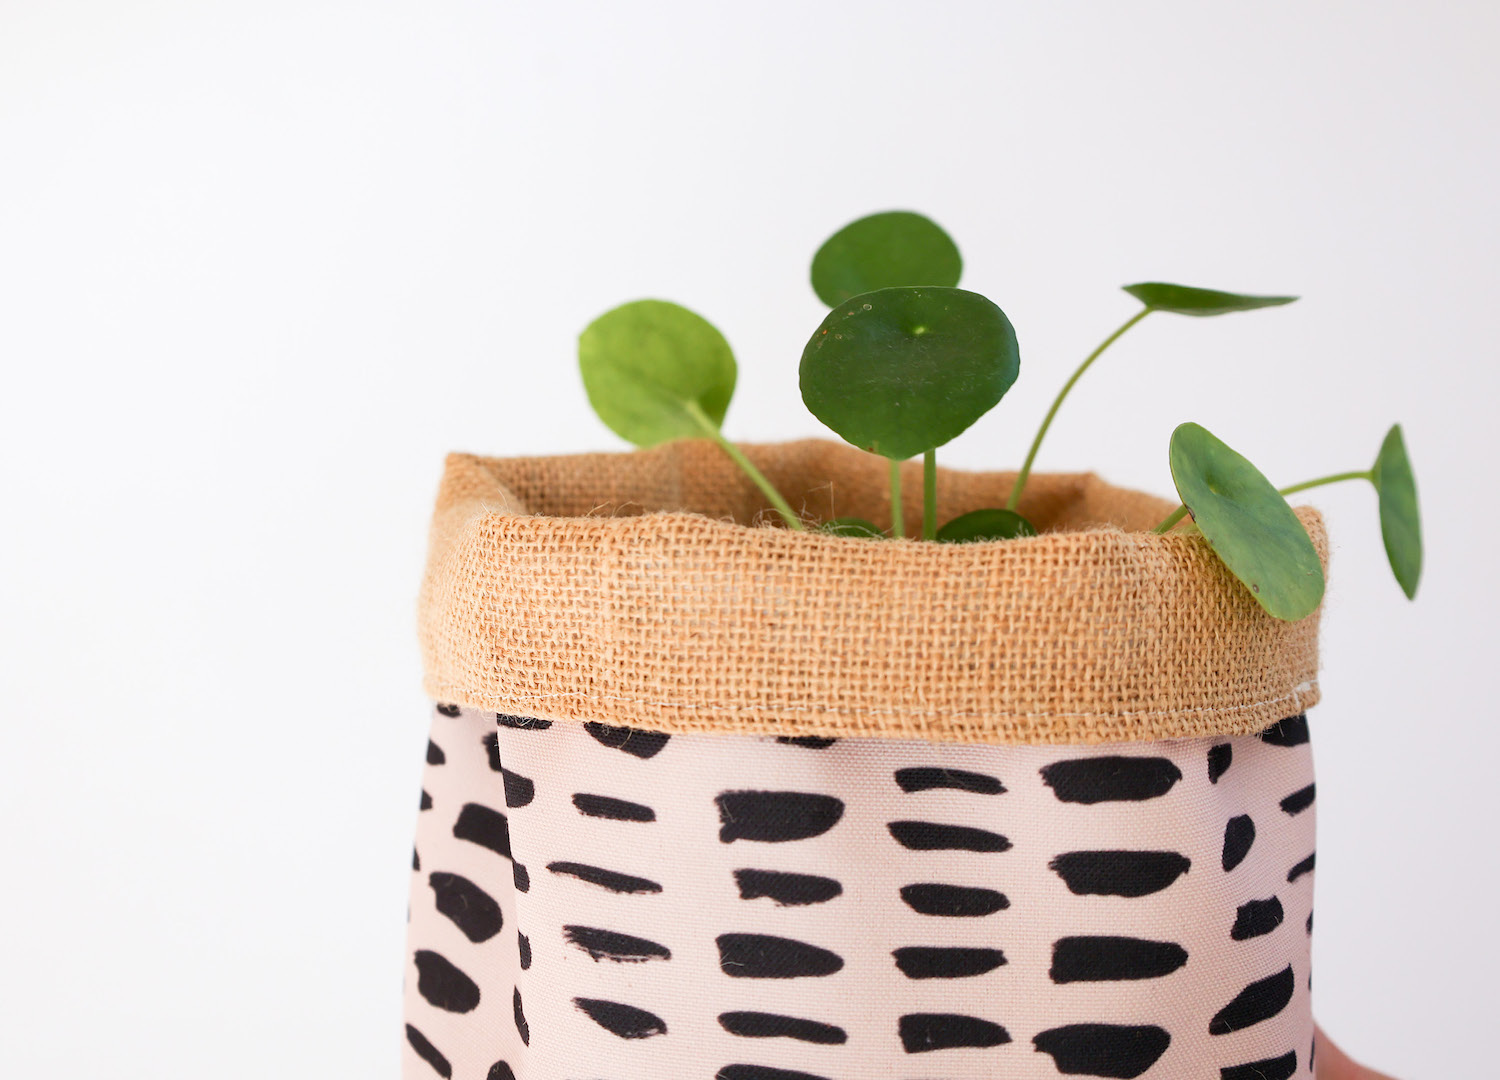
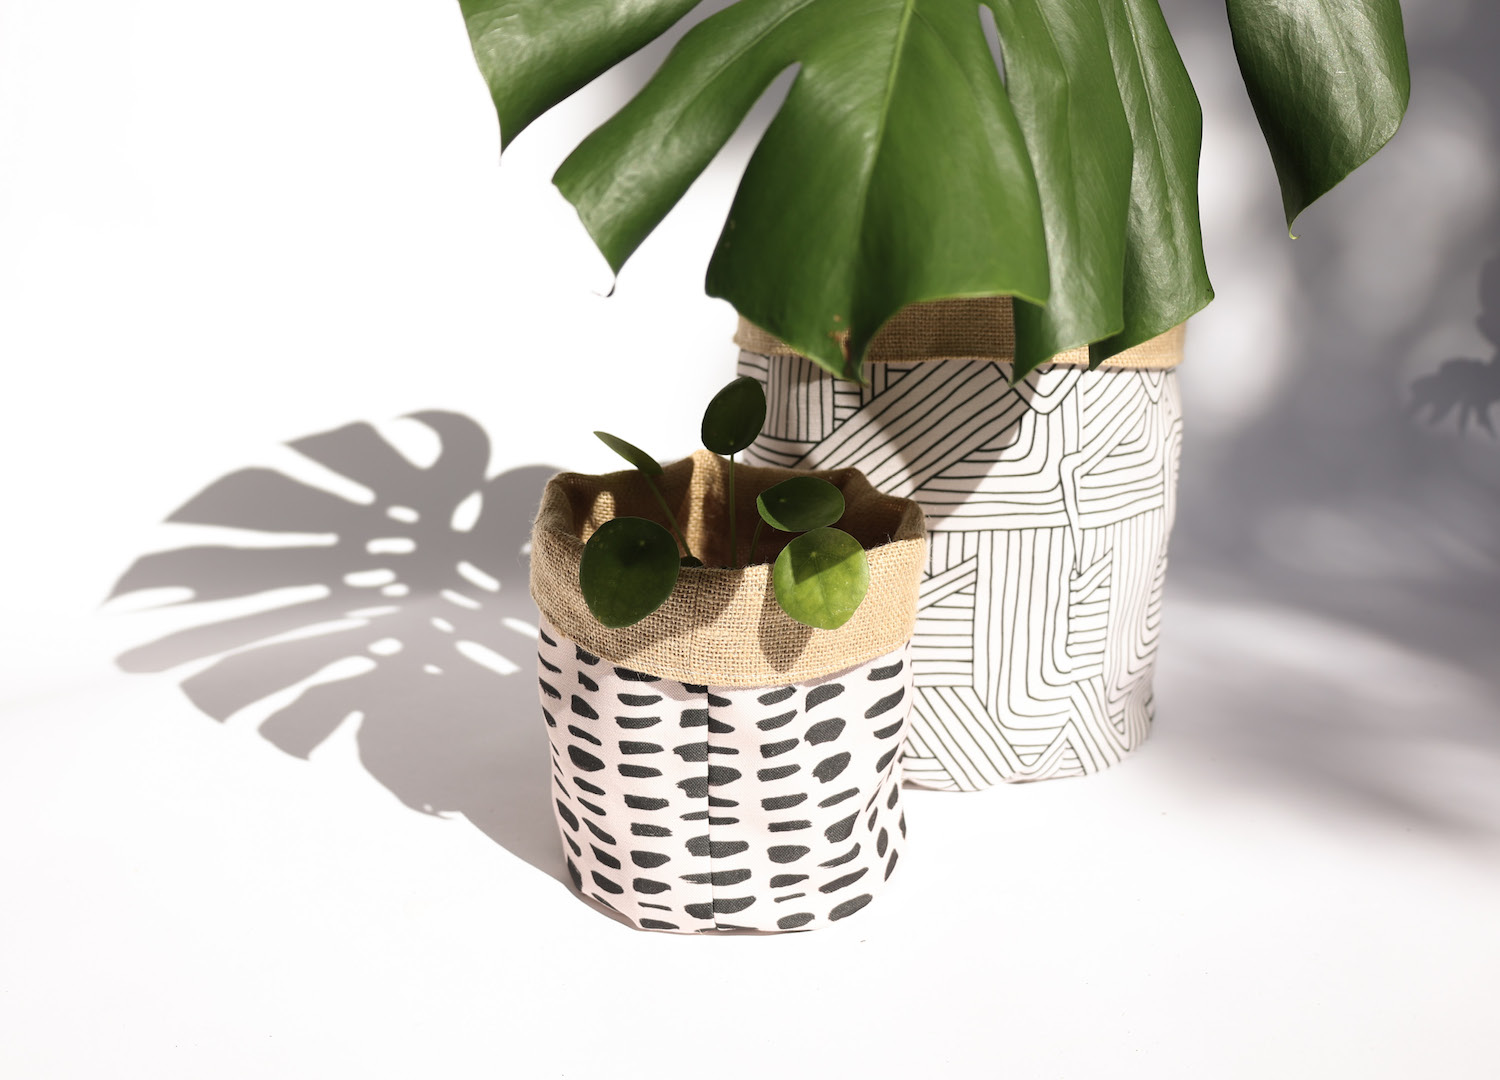
Have fun mixing and matching prints, colour block to your heart’s content or play with texture by adding a hessian lining like we did here. And hey, there’s no reason to limit these to plants. You could create a set of three nesting pots for storing fabric scraps, sewing supplies, knitting projects or whatever odds and ends need a new home.
Sizing Your Planter
Because houseplants come in all different shapes and sizes, we created this tutorial using a simple formula that will allow you to sew any size planter you could dream of! If you already have a plant you’d like to create a home for, you can use its base to create a template. If you don’t have a specific plant in mind, why not start with one of the three sizes below. Some plant pots will widen towards the top, so make sure your planter is large enough to allow for wiggle room so you can get your favourite plant in and out without too much distress.
The template for the planter is made up of two pieces: a circle (base) and rectangle (the sides). You can create the template out of scrap paper or draw the dimensions directly onto the back of your fabric.
Create Your Template
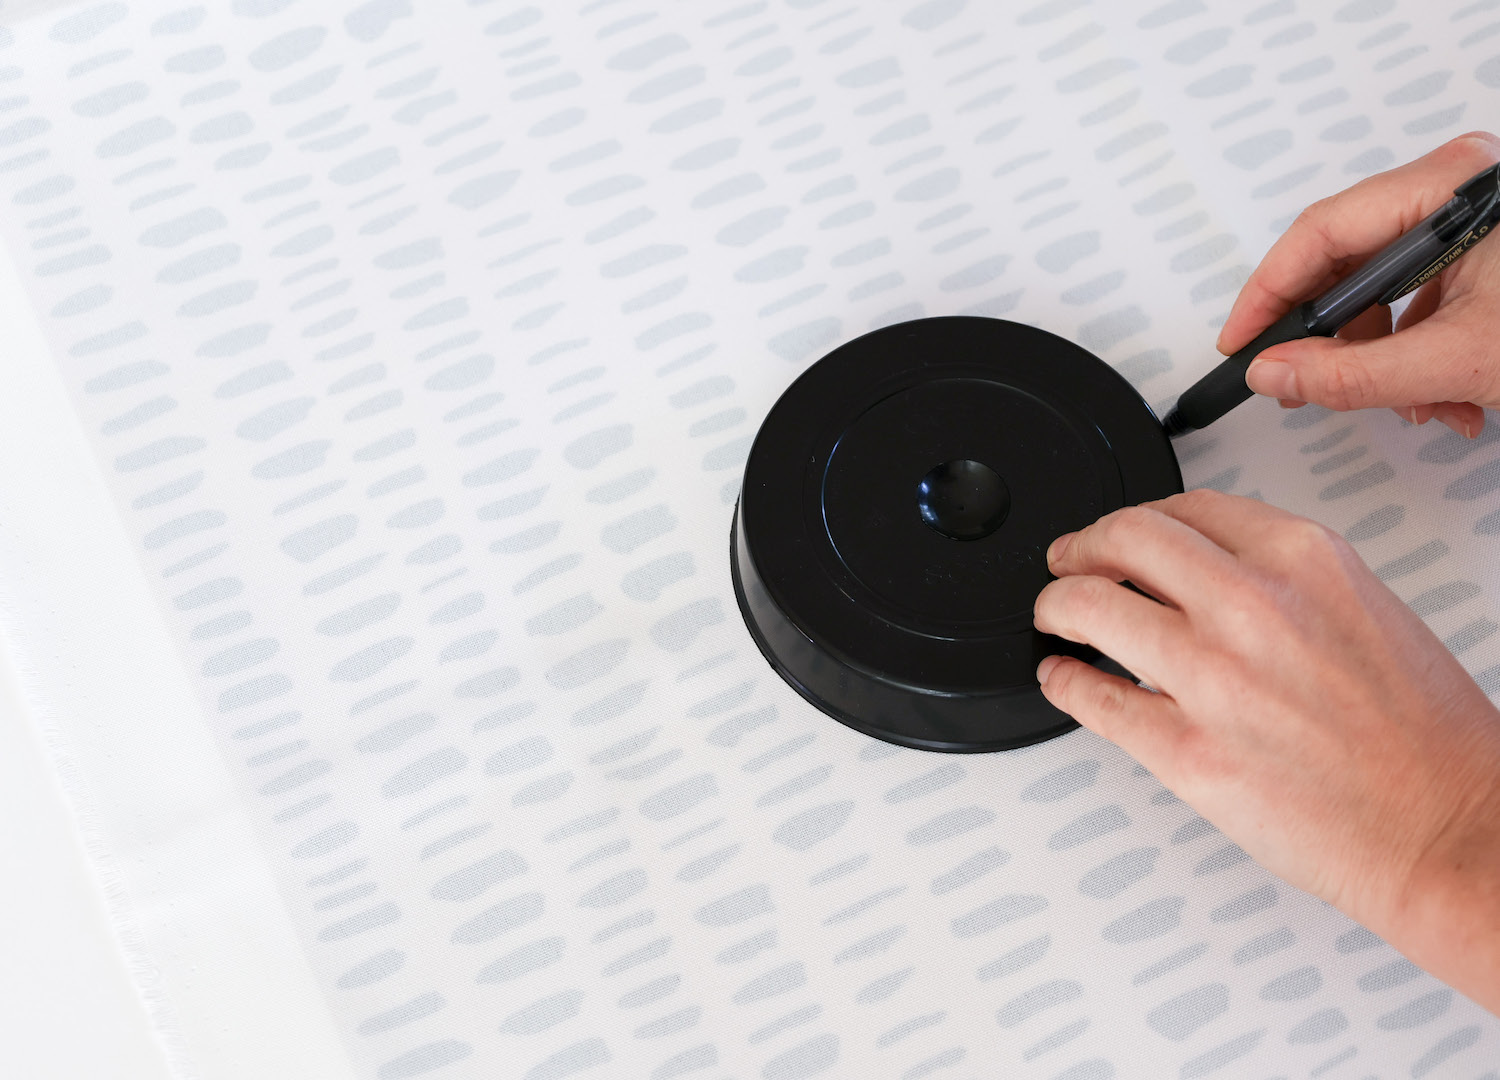
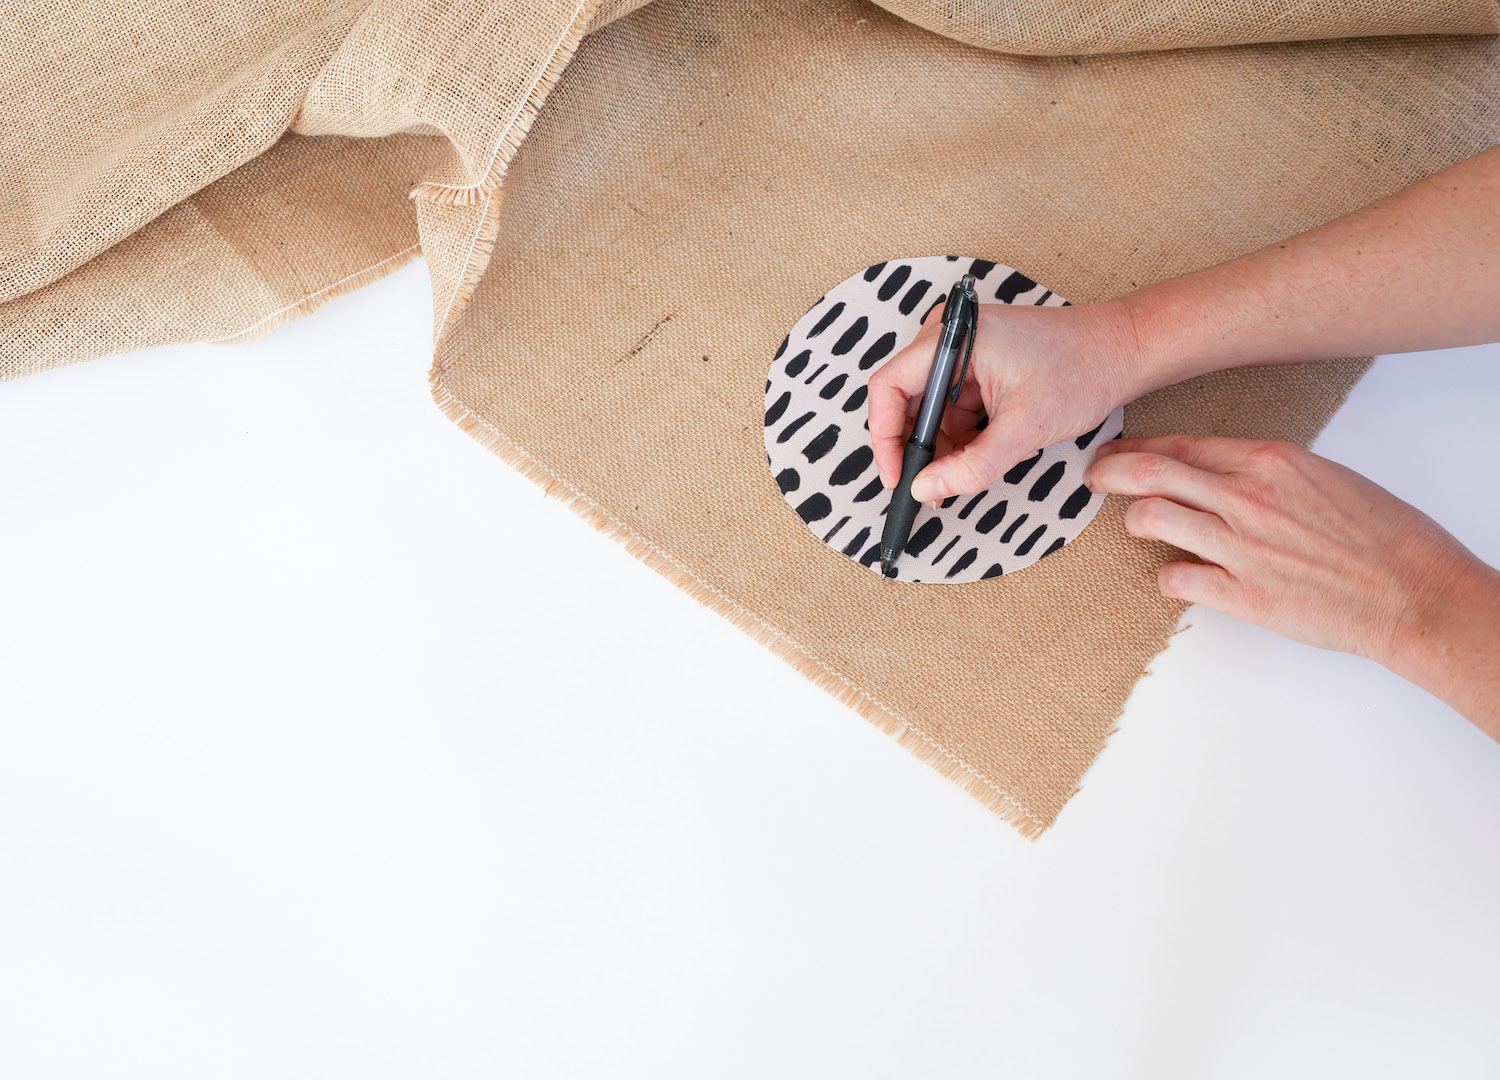
STEP ONE // Trace around a circular pot base onto a scrap piece of paper or directly onto the back of the fabric.
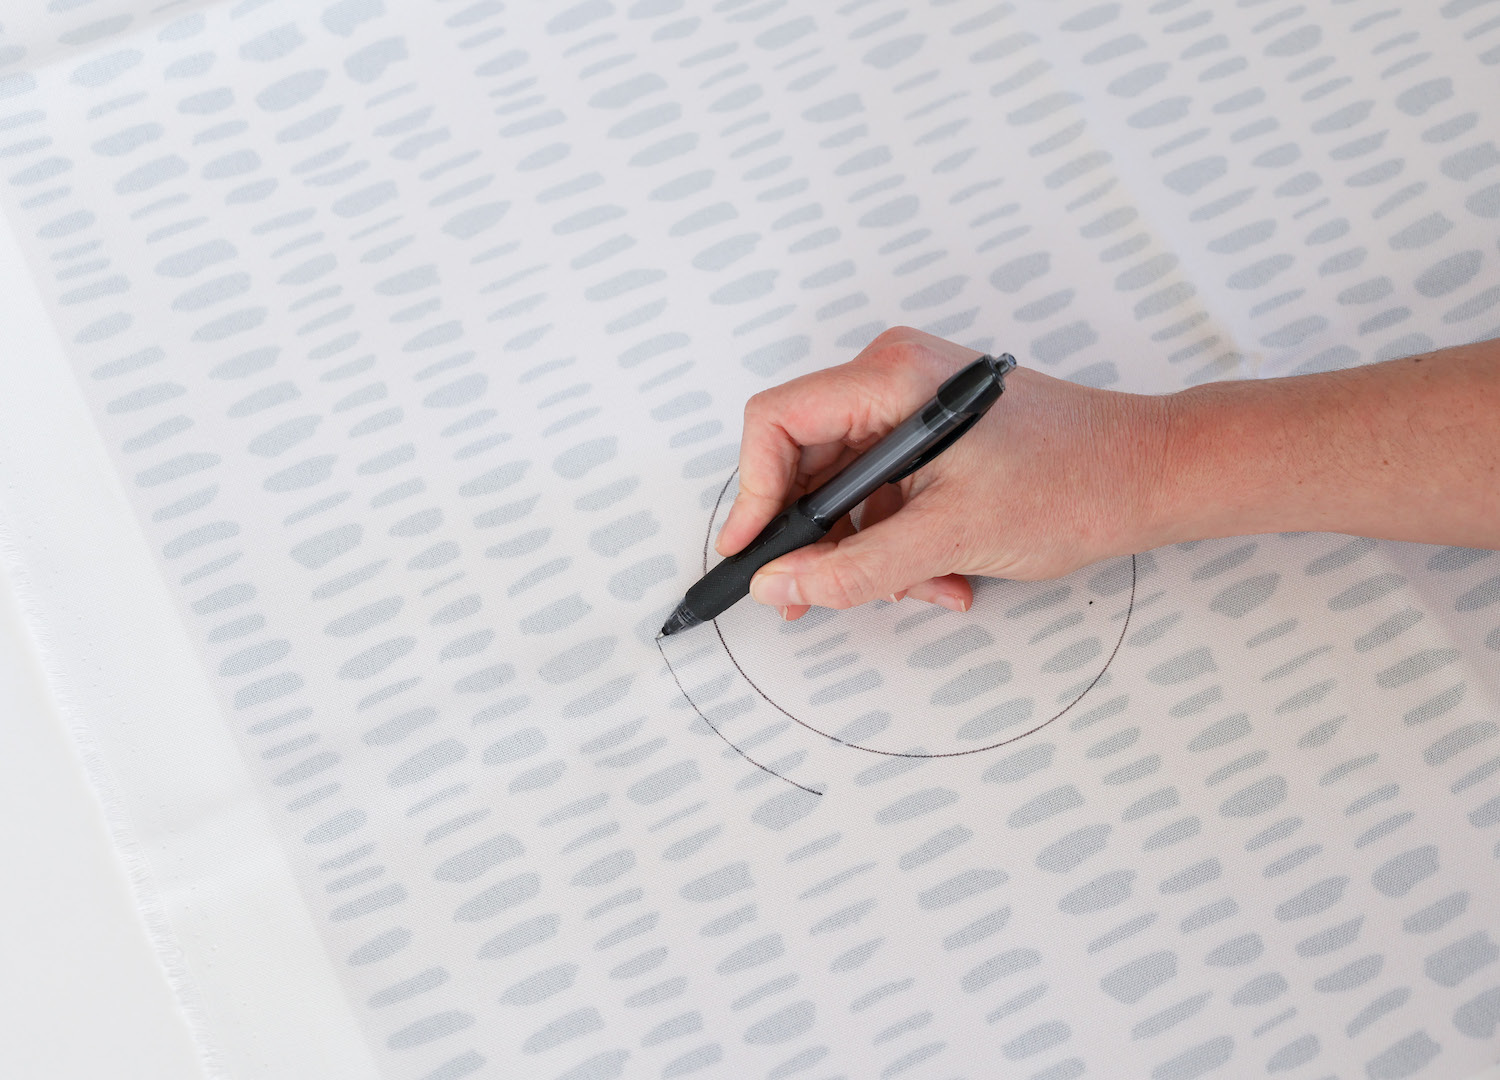
STEP TWO // Draw a second circle around the outside of the first, 2cm wider in all directions to accommodate a 1cm seam allowance and wiggle room.

STEP THREE // To calculate the length of the rectangle, multiple the diameter of the largest circle you’ve just drawn by pi (~3.14).
Example: for a 17cm diameter base, the length of the rectangle is 17cm x 3.14 = 51.38cm.
STEP FOUR // Decide how tall you would like the planter, as this measurement will become the width of the rectangle template piece: for the small size planter, we measured a height of 22cm (remembering you have the option to fold down the top of the planter 5cm or so once finished). Add 1cm seam allowance at each end = 24cm
In this example, the final dimensions for the rectangle template are: length = 51.38cm x width = 24cm
READY TO GO TEMPLATES
Small Circle diameter= 17cm | Rectangle length 51.38cm x width 24cm
Medium Circle diameter = 21cm | Rectangle length 65.94cm x width 28cm
Large Circle diameter = 24cm | Rectangle length 78.5cm x width 35cm
Suggested Fabrics
To give your new fabric planter a long and happy life, we’d recommend choosing a home-decor weight material like canvas, for at least one of the layers. You could even use completely upcycled fabrics (here’s some helpful ideas of where to source quality secondhand textiles) or retired coffee sacks.
For this tutorial, we were excited to try out the new recycled canvas from Spoonflower: a woven, upholstery weight fabric made from Repreve (50% recycled polyester fibre).
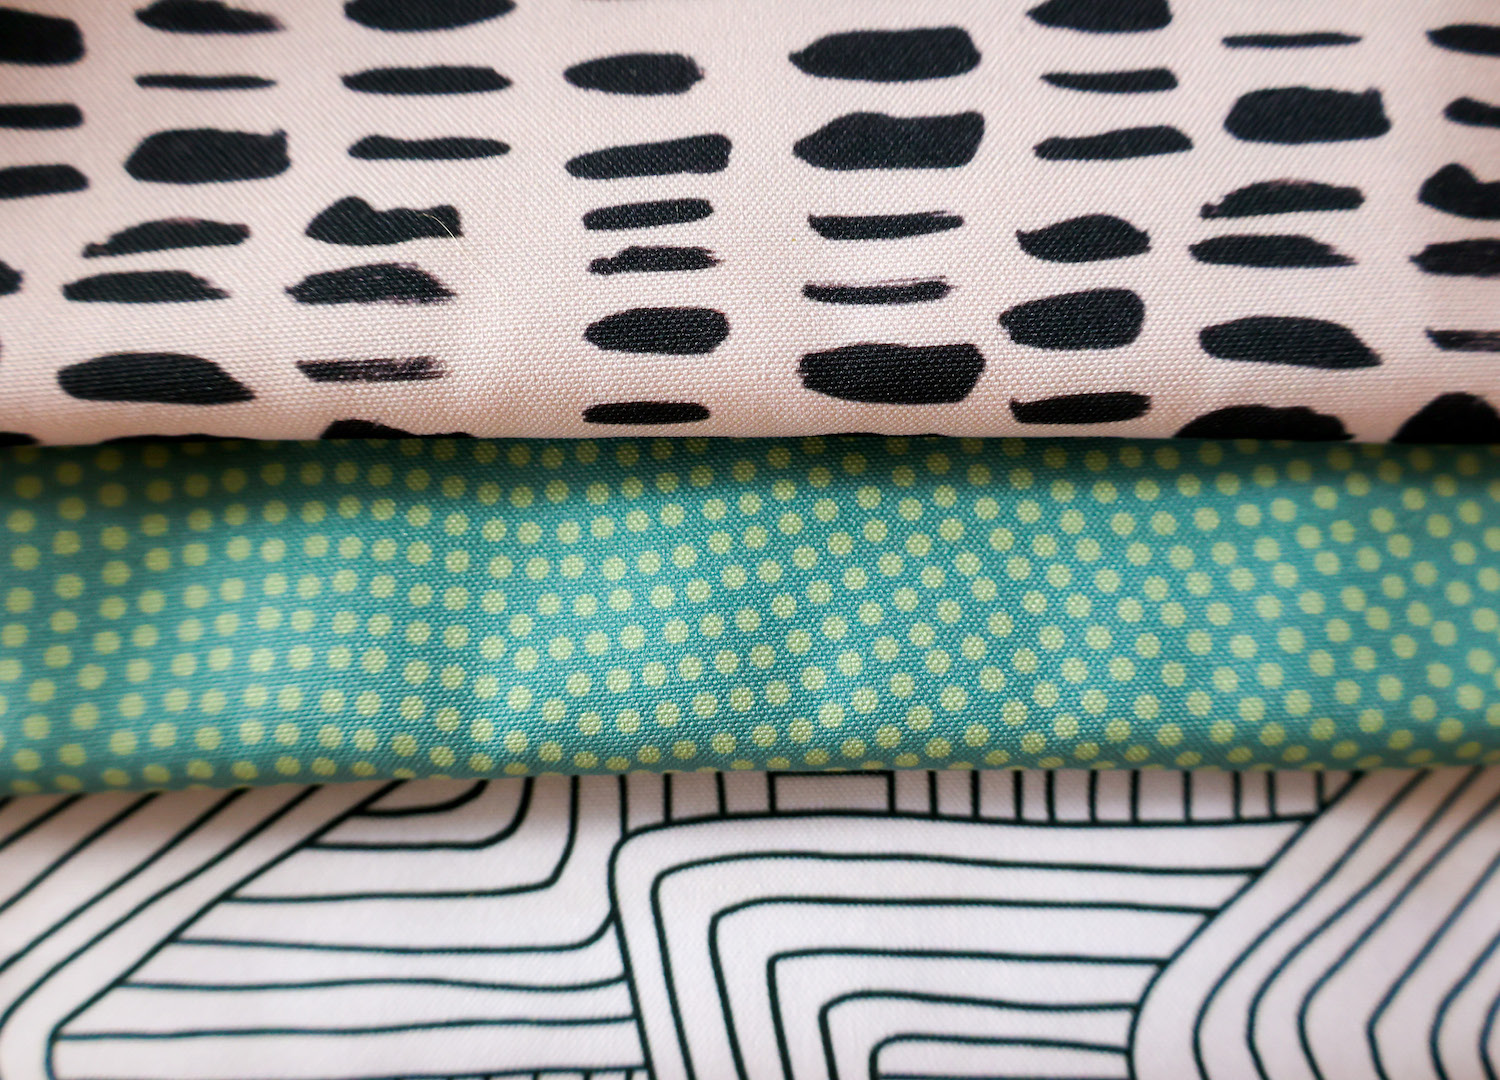
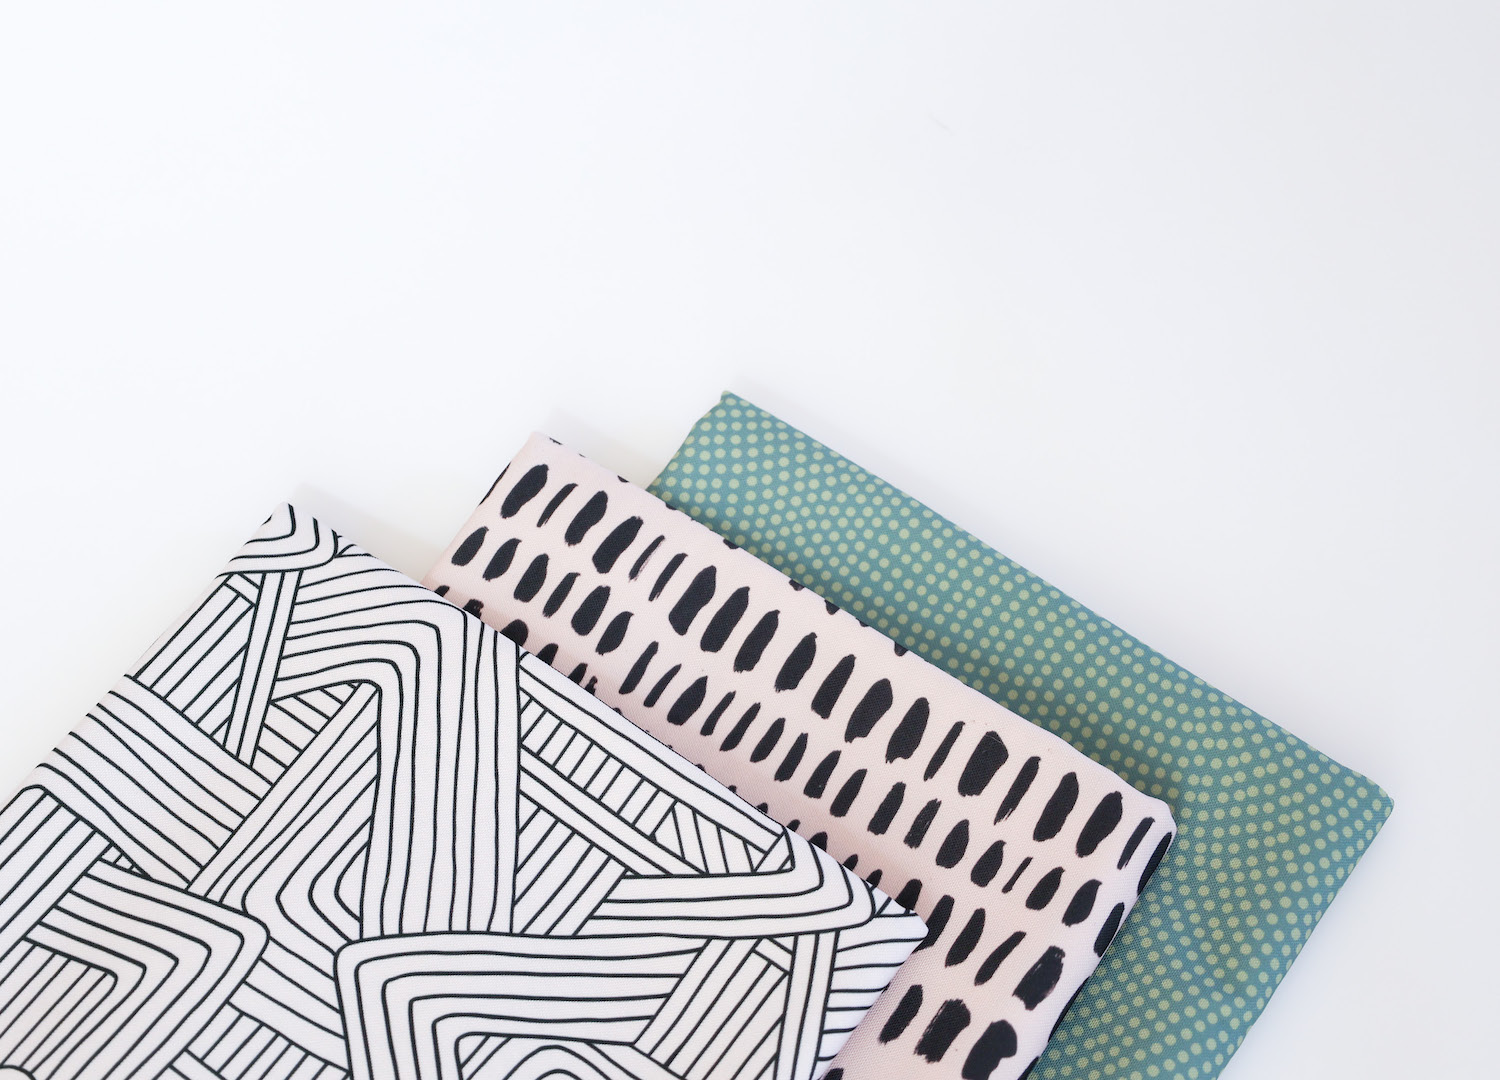
PRINT ONE // Fibonacci-flower Polkadots by Weaving Major
PRINT TWO // Black and Tan by Briana Corr Scott
PRINT THREE // Little Maze Stripes by Little Smile Makers
What you will need
Fabric for outer
Fabric for lining
Sewing machine and thread
Tape measure
Scissors
Pins
Pen or fabric marker
Let’s get making!
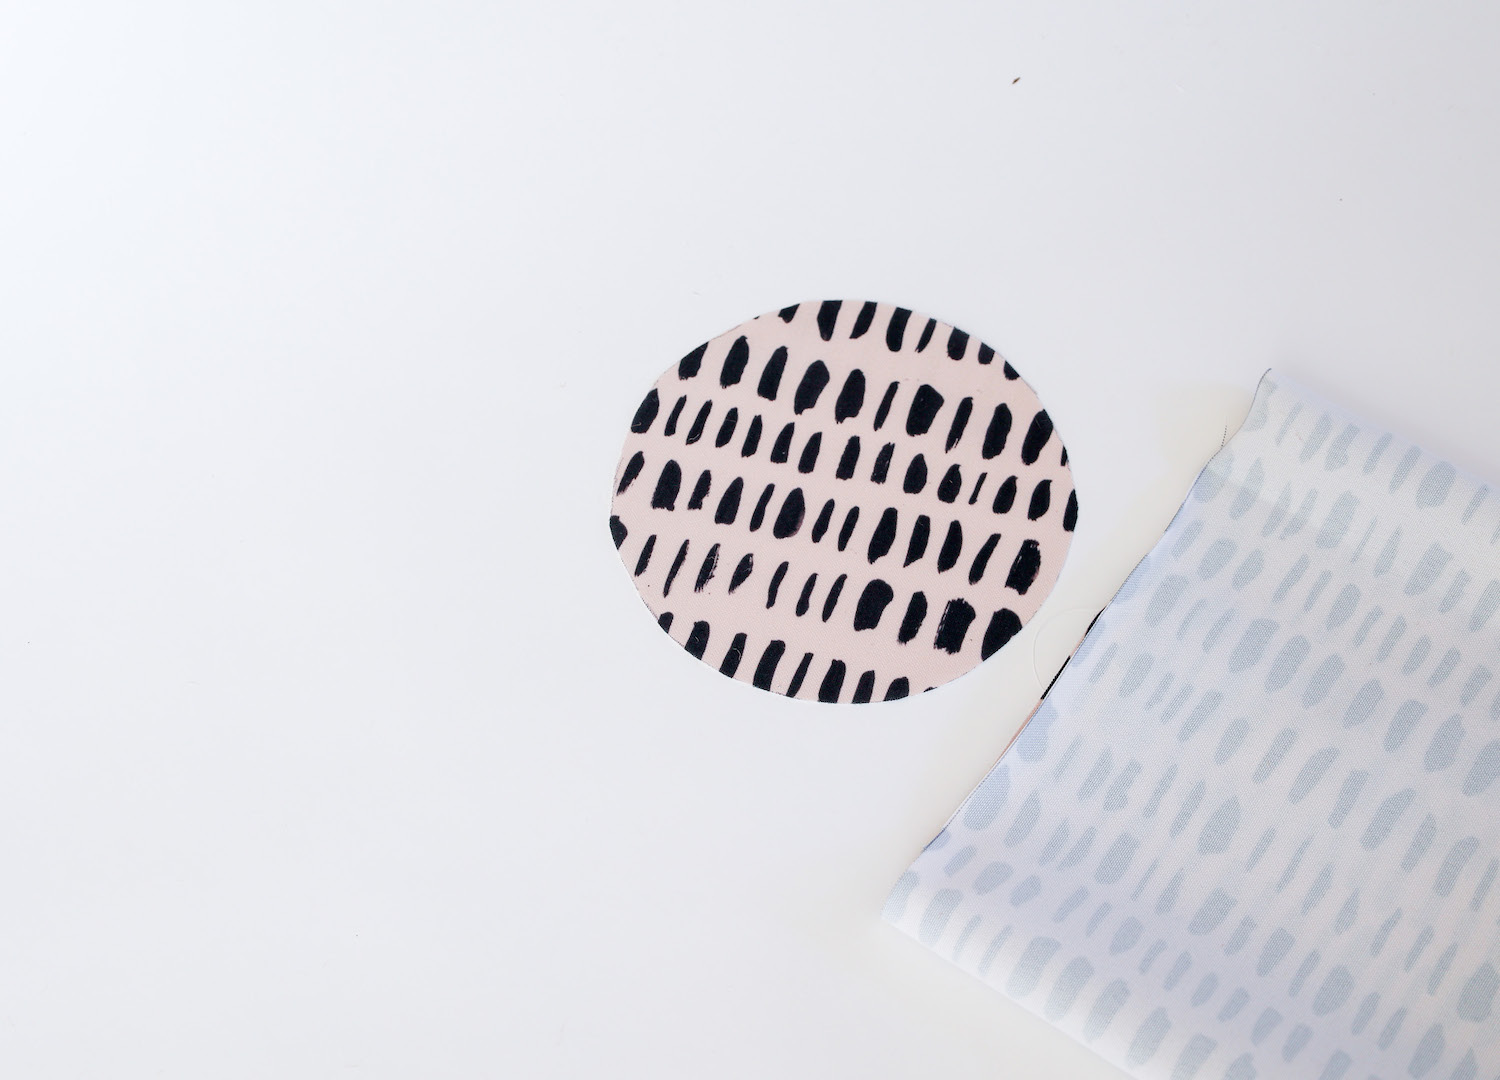
STEP ONE // Once you’ve created your template, trace out the dimensions of the rectangle and circle directly onto the fabric for the main (outer) and lining (inner) pieces.
STEP TWO // Take the rectangle you cut from the main fabric and with right sides facing, sew the short ends together with a 1cm seam allowance. Press the seam open. You now have a tube!
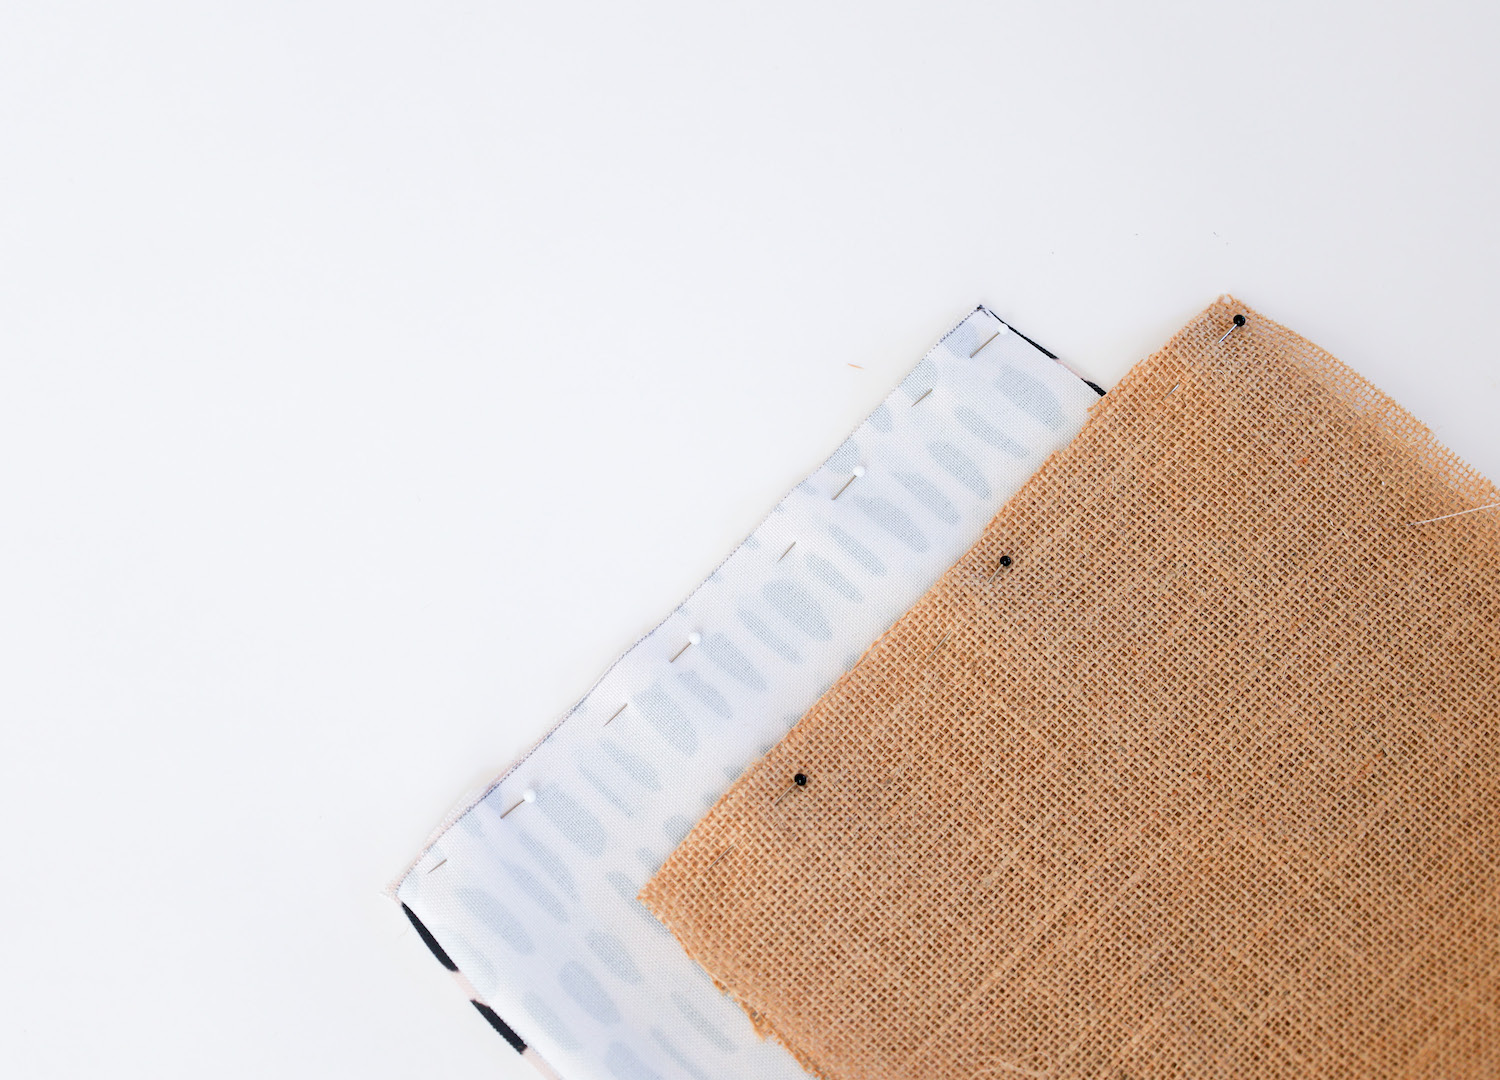
STEP THREE // With right sides together and raw edges aligned, pin the circular base to the inside of the rectangle loop. This may take a bit of manoeuvring!
STEP FOUR // Sew base and rectangle together with a 1cm seam allowance. Go slowly and rotate the fabric around in sections.
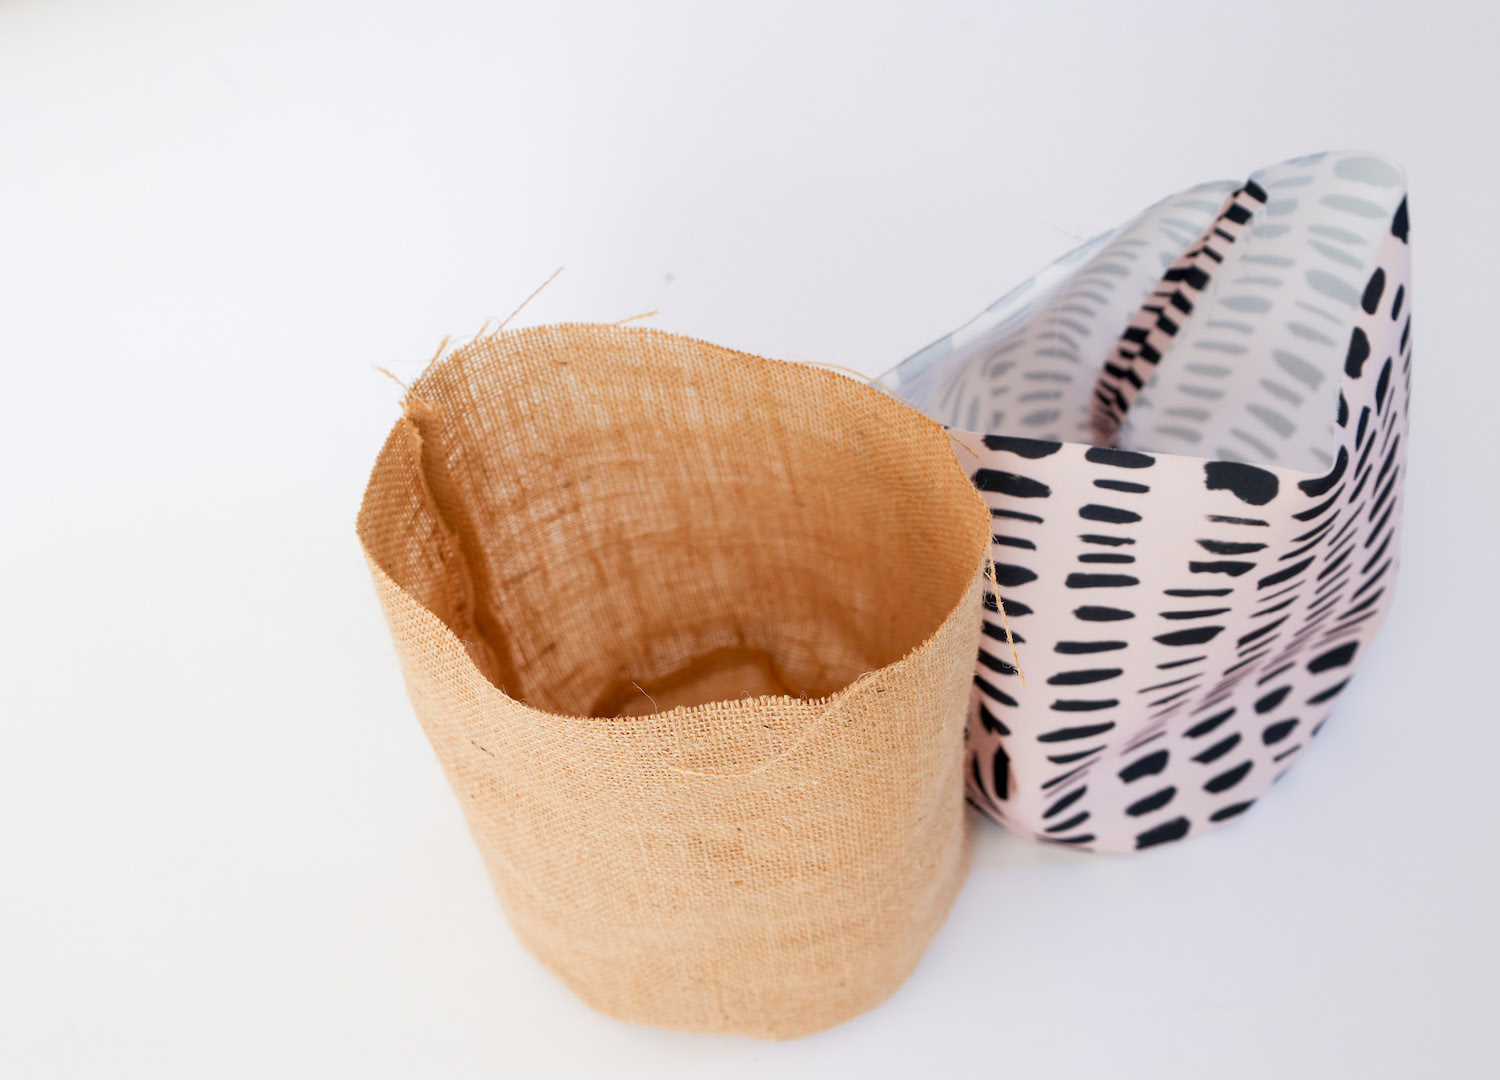
STEP FIVE // Repeat steps two to four for the lining (inner) fabric. You will now have an outer basket and an inner basket… Halfway there!
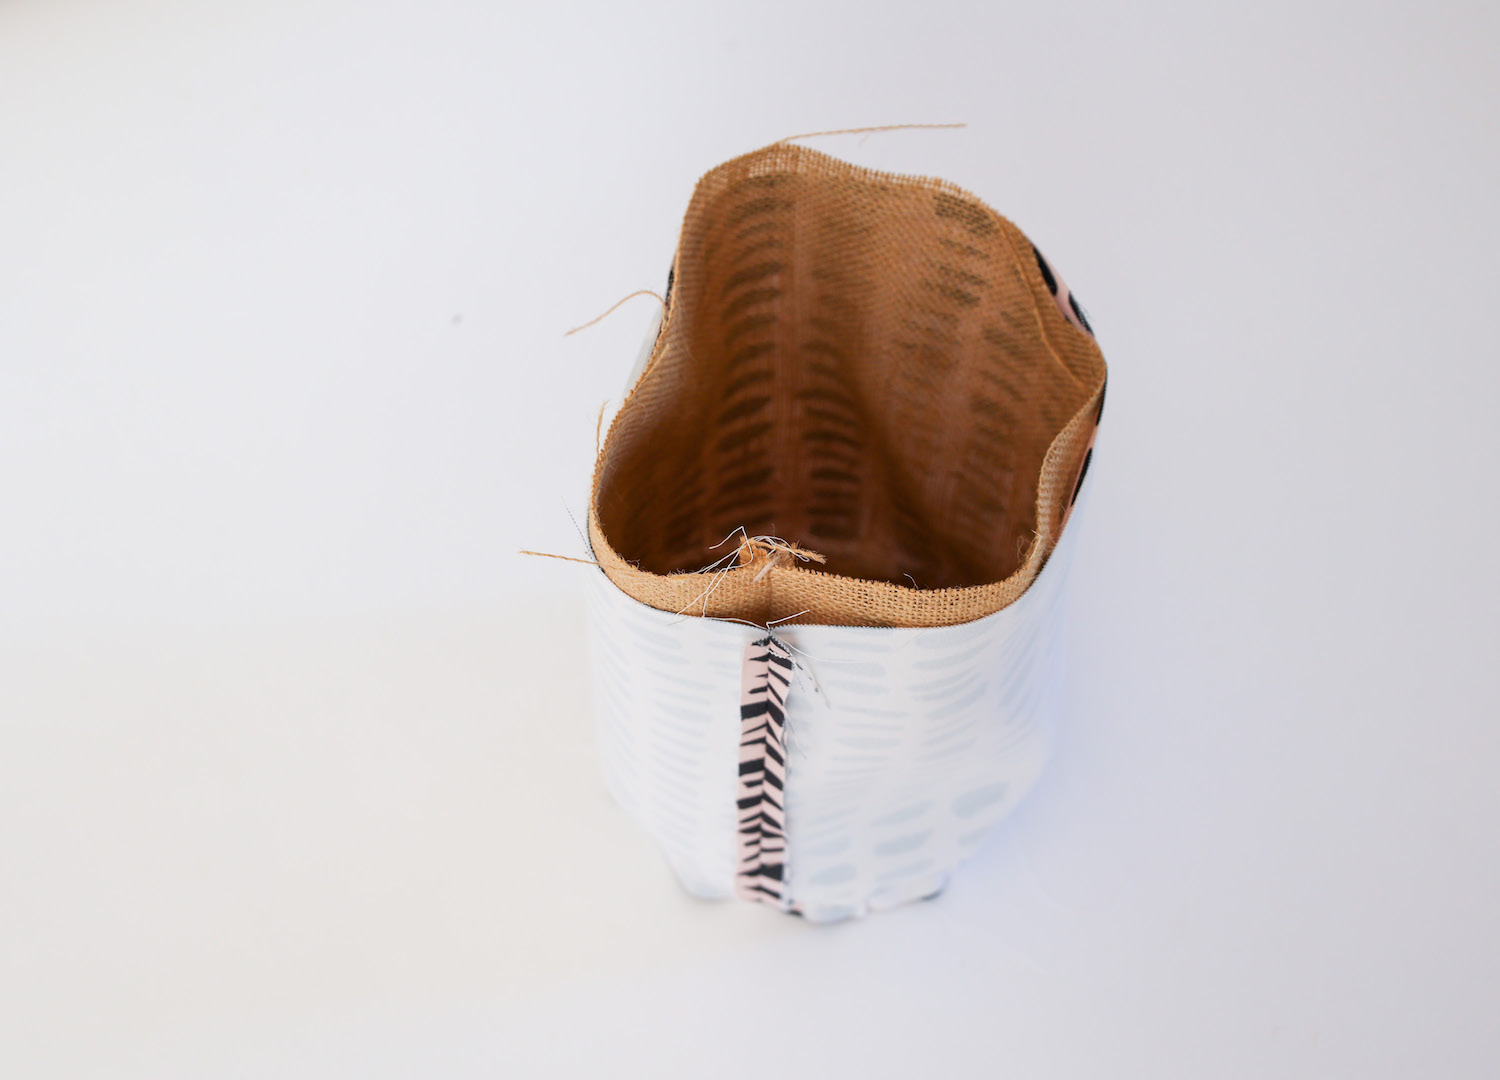
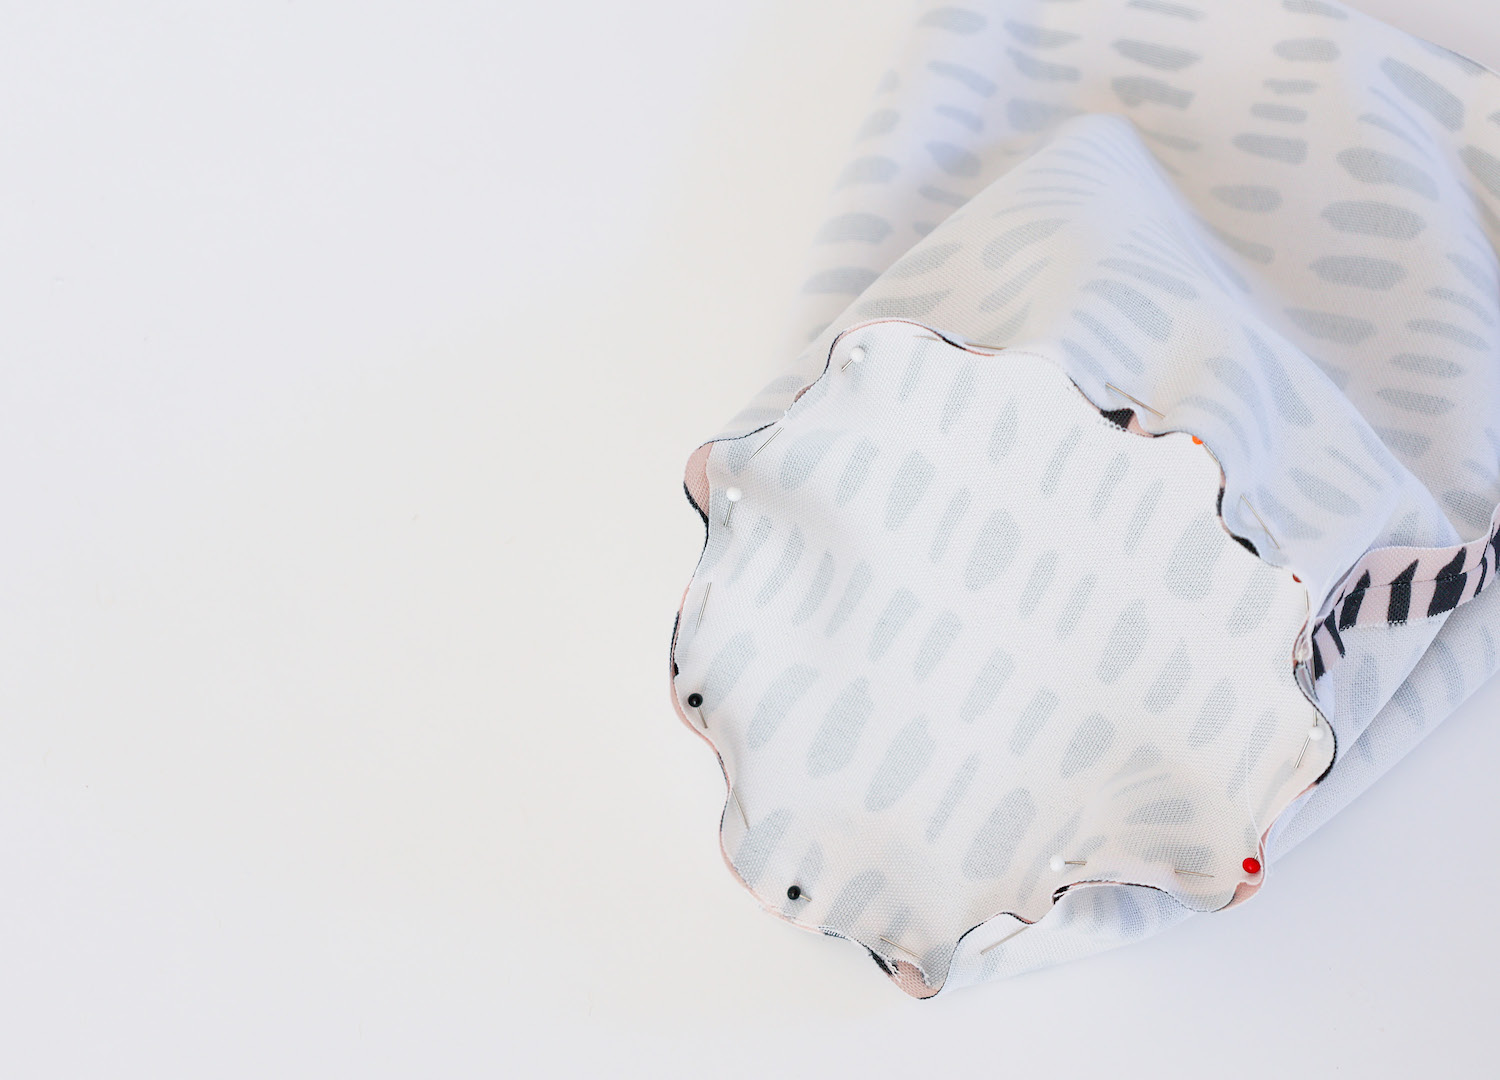
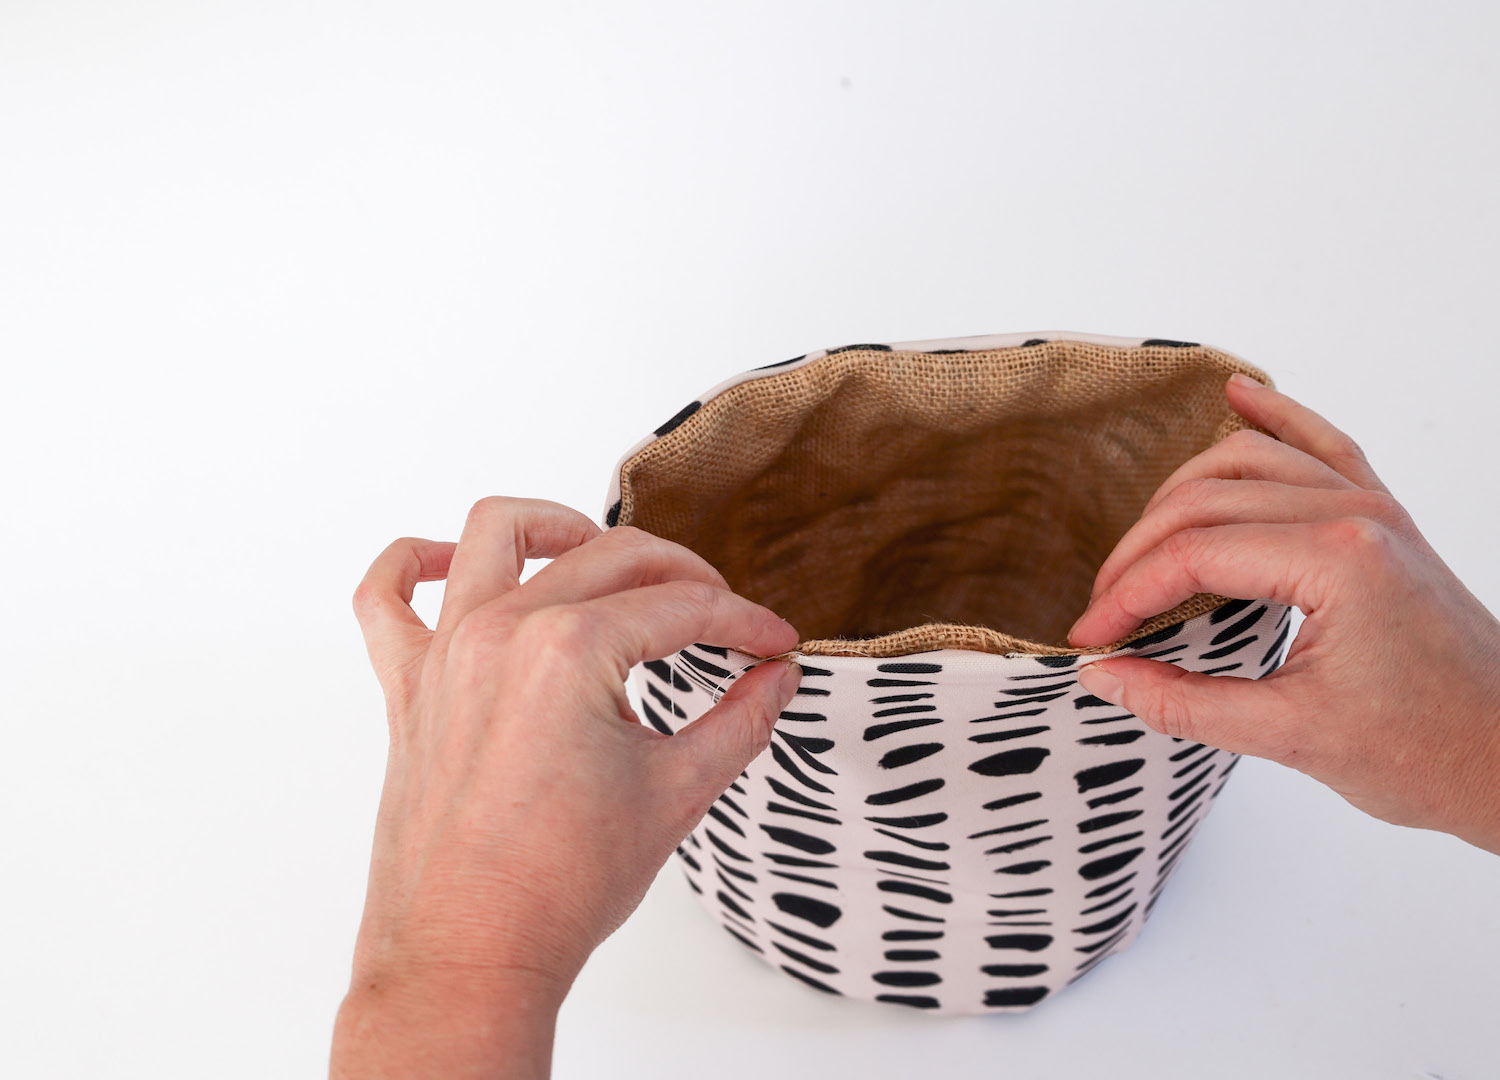
STEP SIX // Turn the outer basket to face the inside and place the lining basket inside the outer, with right sides of the fabric facing each other. Line up the raw edge and pin in place.
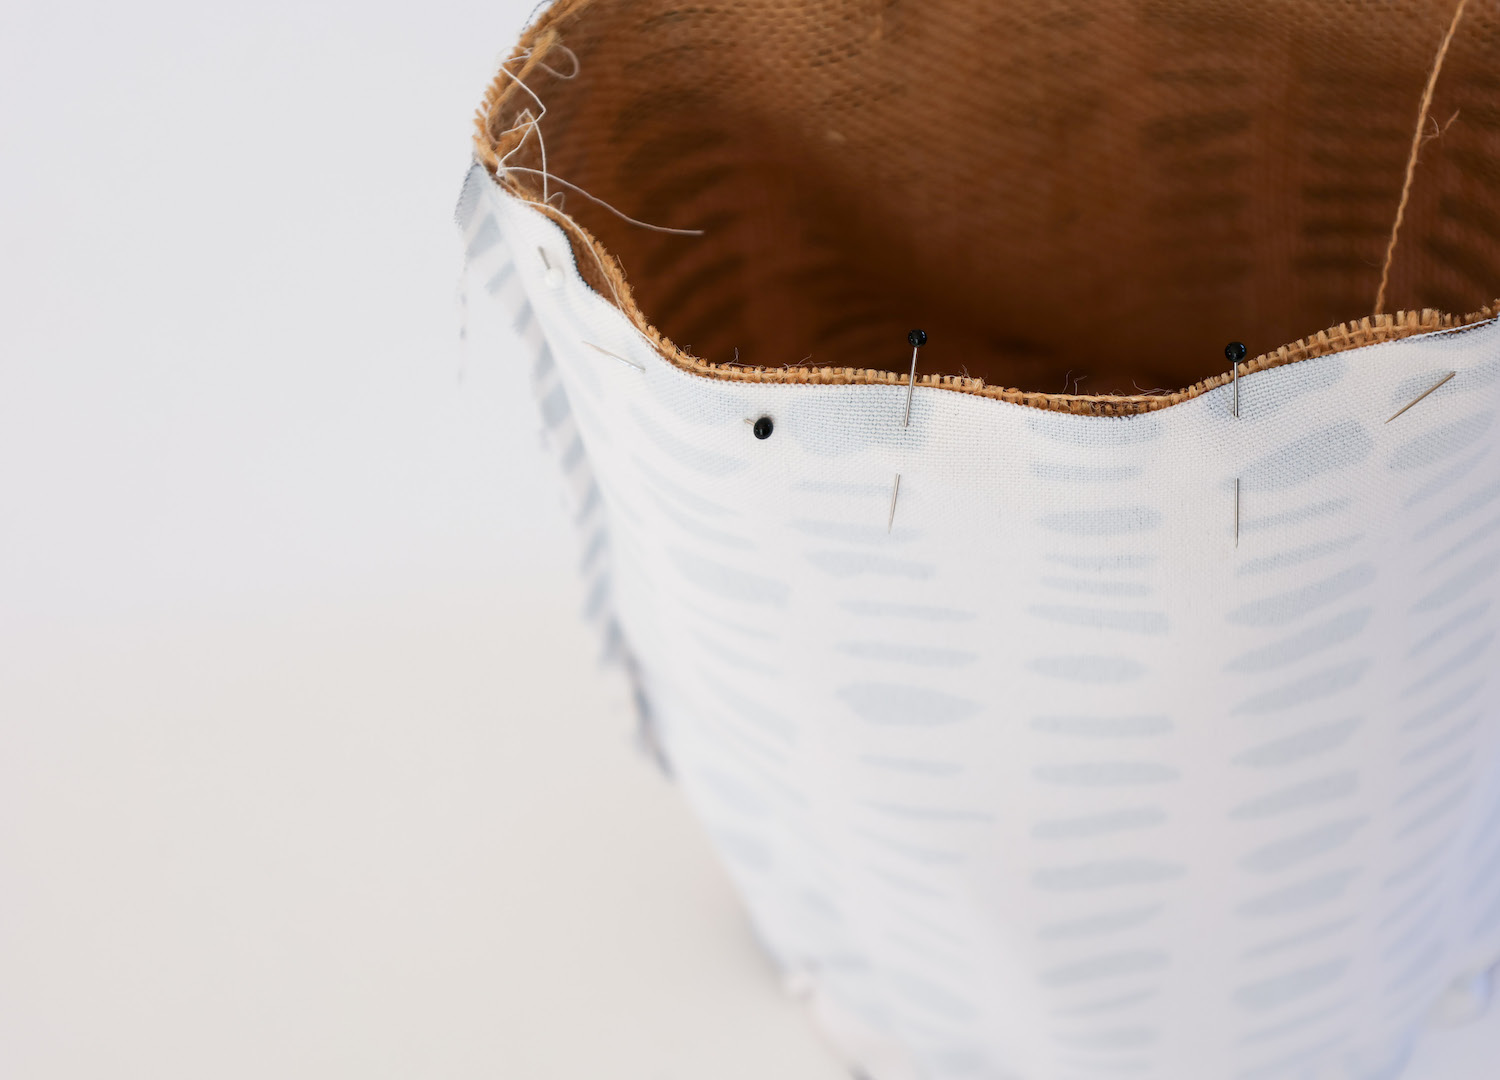
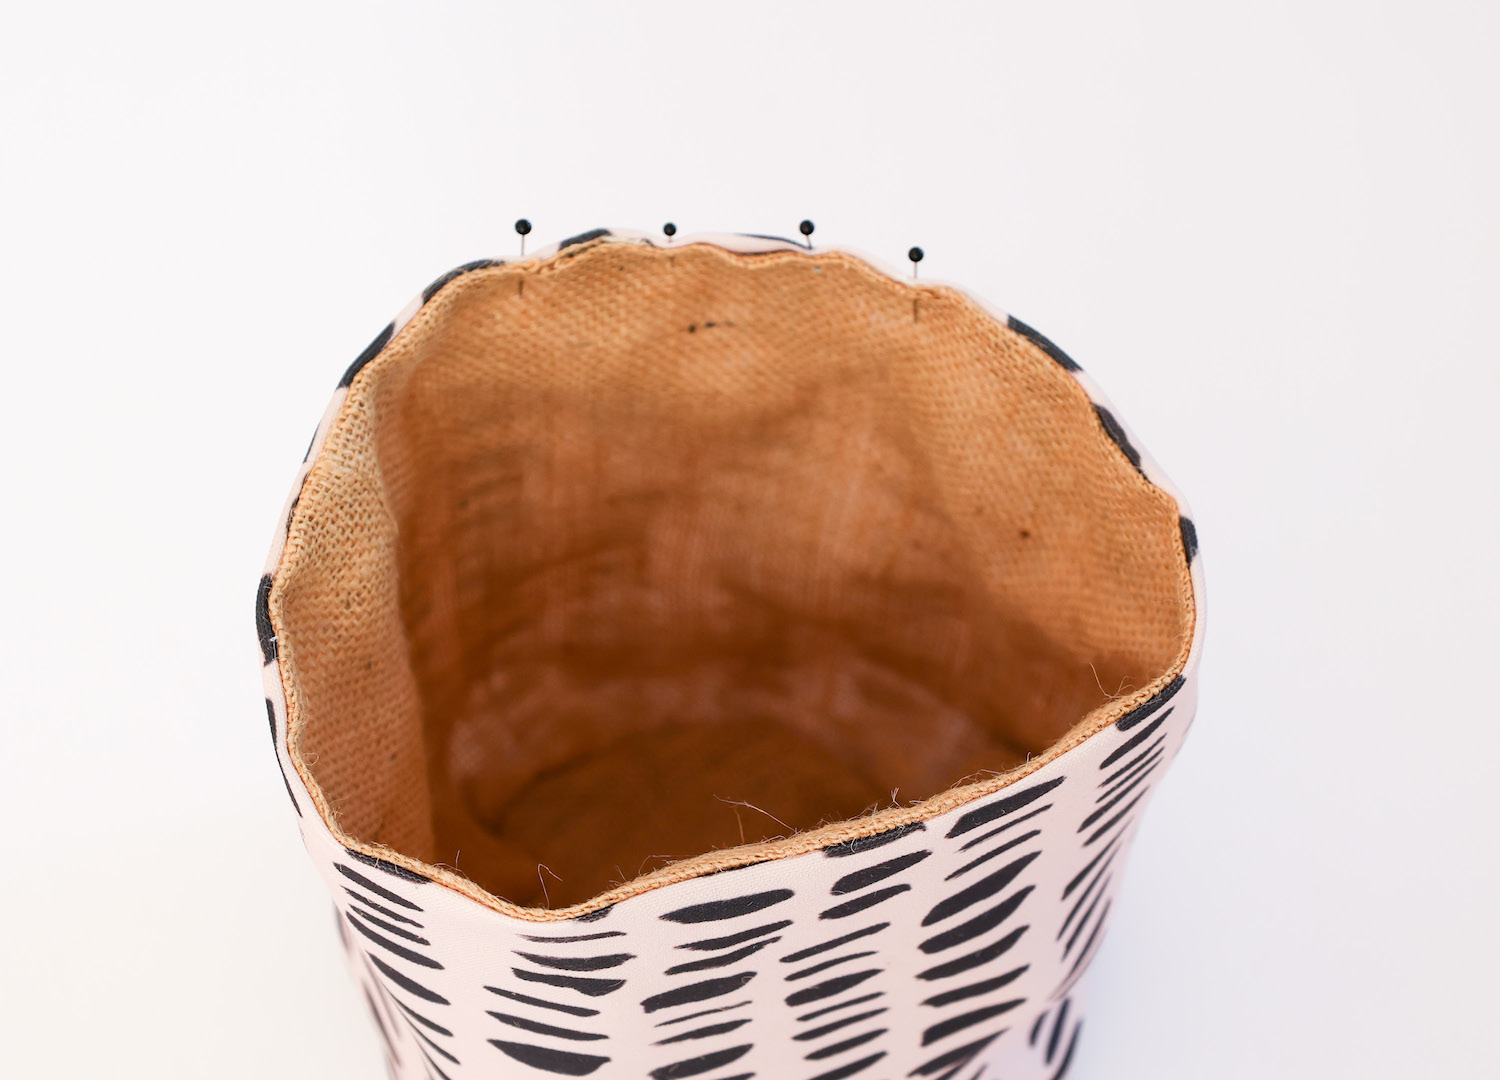
STEP SEVEN // Sew together with a 1cm seam allowance, leaving a gap of 5cm (back stitching at start and end) to turn out the right way.
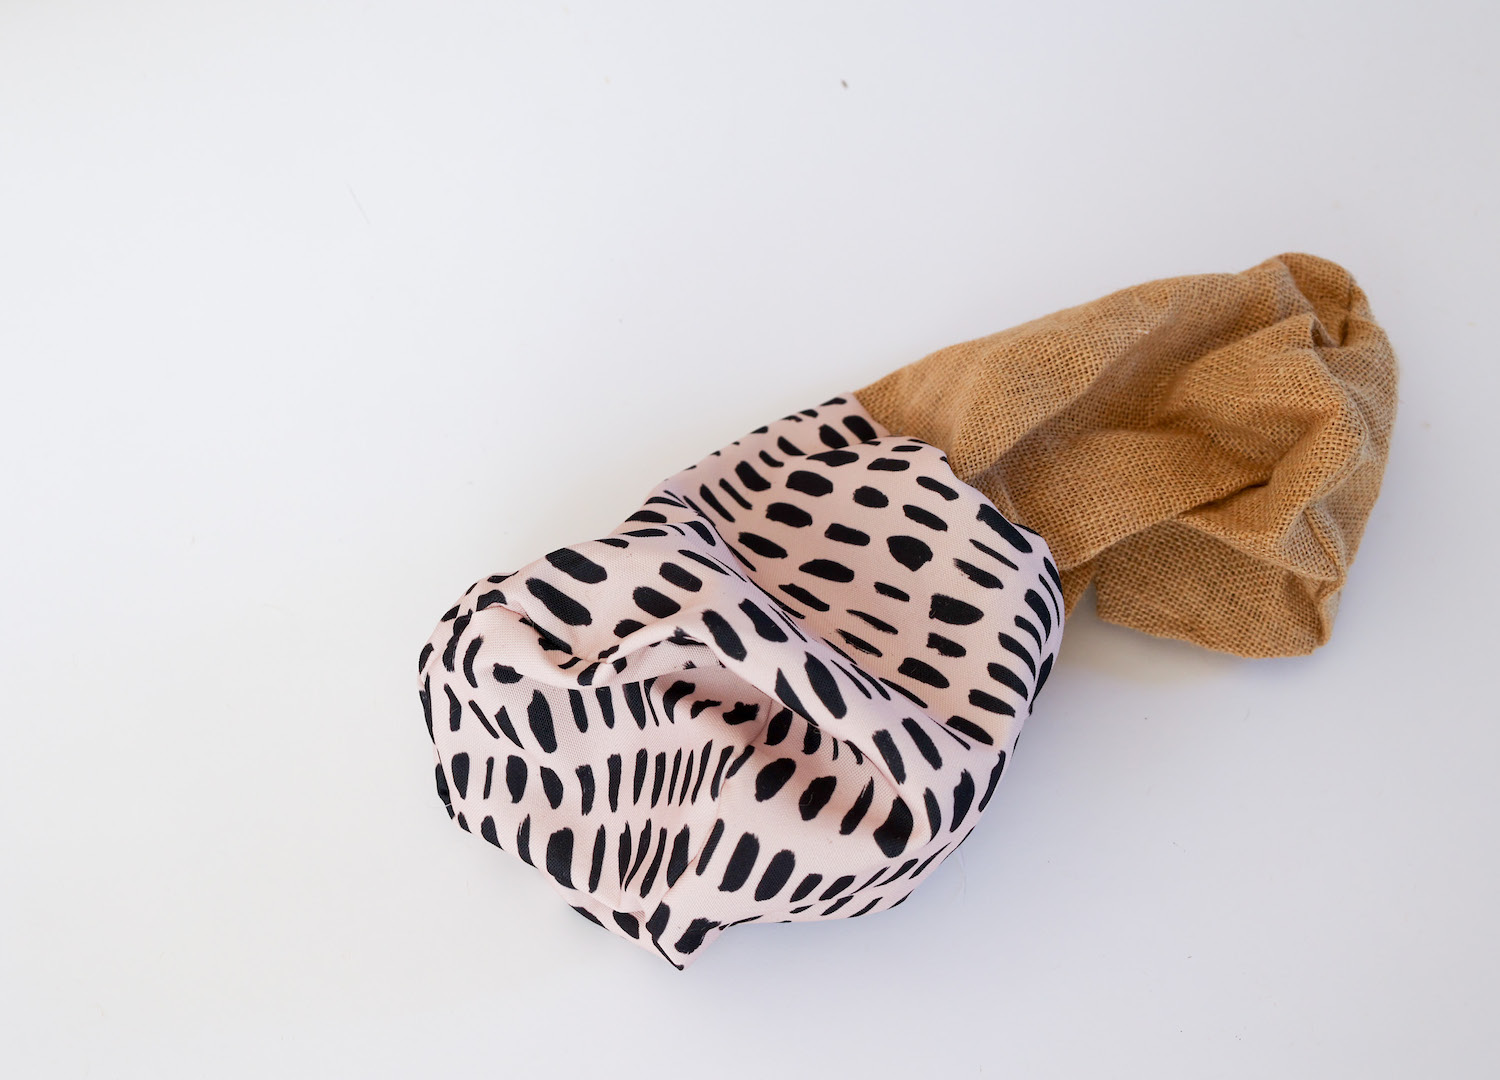
STEP EIGHT // Turn out the right way by gently pulling the fabric through the opening.
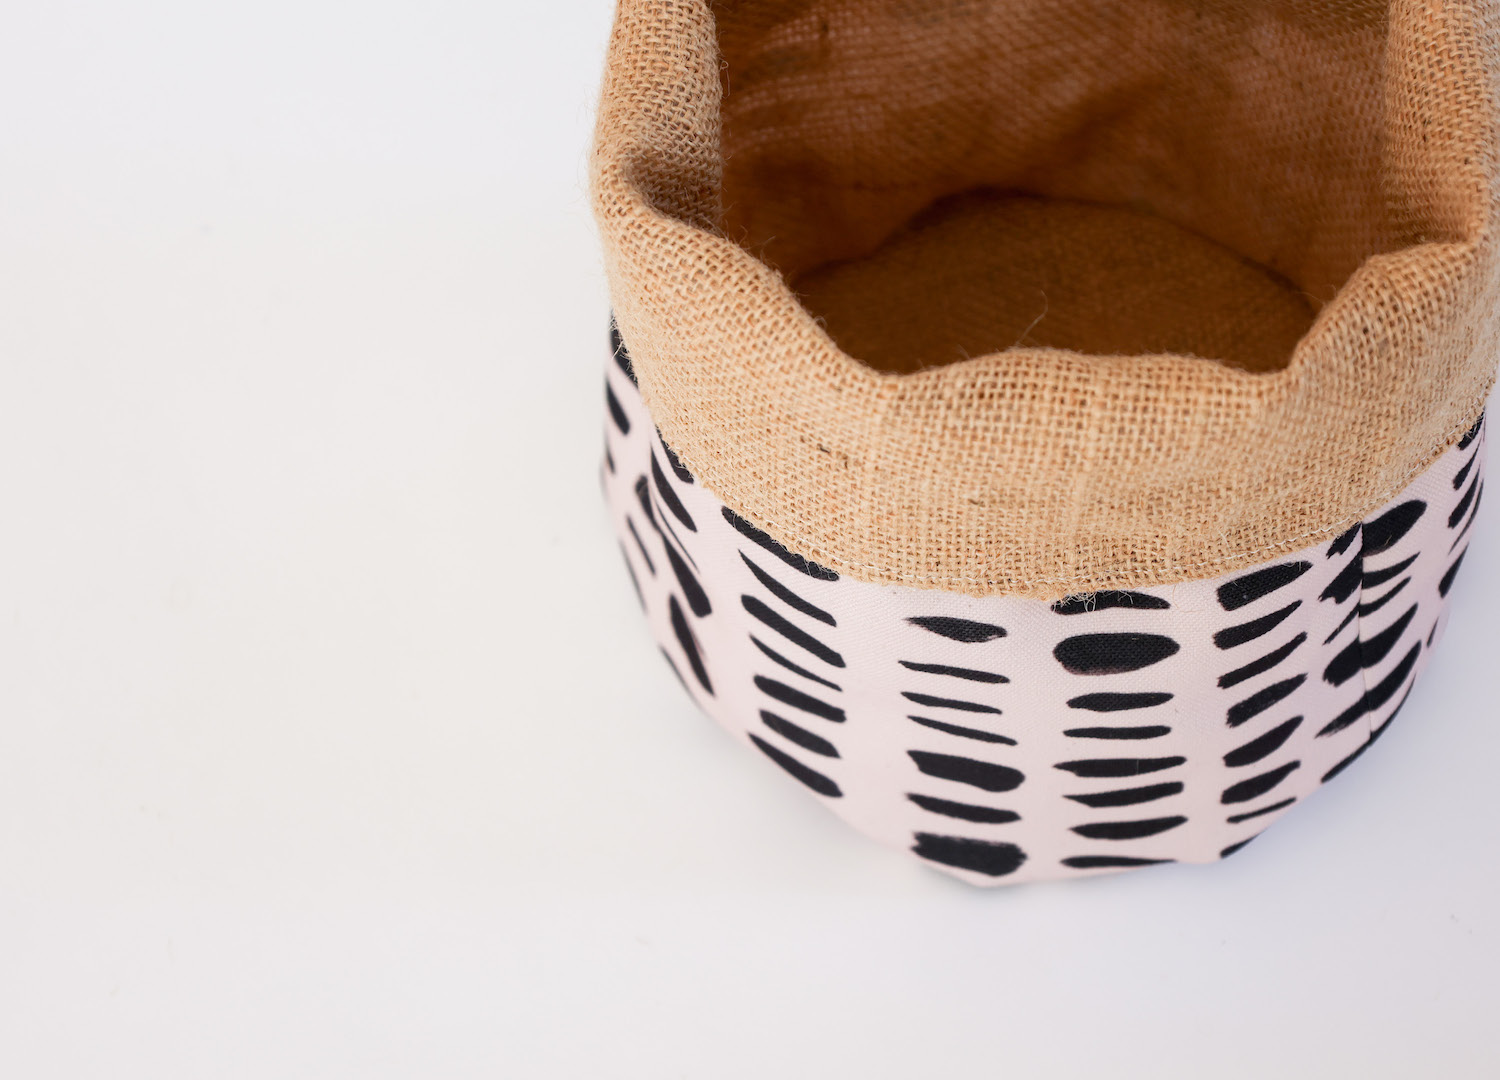
STEP NINE // To close the gap, tuck the raw edges inside and press around the edge.
STEP TEN // To finish, top stitch around the edge and give your planter a final press.
BONUS | HANGING PLANTER HACK
Take your fabric planter to new heights – why not create a hanging planter by adding metal eyelets and rope. You can find eyelet punching kits (which include the tools) in the haberdashery section of your local fabric store.
PHOTOS AND WORDS: SOPHIE PARSLOW FOR PEPPERMINT.