We partnered with our good friends at Lighthouse Baking to bring you a range of delicious offerings that are perfect for the festive season and beyond – for the big finale, we recommend you wow your crowd with this delectable Tangelo & Wattleseed Cake. But be warned: one slice is never enough!
Cake
450g Lighthouse Premium All Purpose Plain Flour
2 tsp roasted ground wattleseed powder
1 tbsp baking soda
pinch of fine salt
1 cup Greek natural yoghurt
zest and juice of 1 tangelo
1 tsp vanilla bean paste
300g unsalted butter, plus extra for greasing
1 1/3 cups caster sugar
3 eggs, lightly beaten
1–2 tangelos, and a flower of your choice to decorate
Syrup
1 cup freshly squeezed and strained tangelo juice
40ml freshly squeezed and strained lemon juice
75g caster sugar
Icing
175g unsalted butter, softened
270g icing sugar
120g cream cheese, softened
120g mascarpone
1 tbsp milk
1 tsp vanilla bean paste

Method
Preheat your oven to 180C. Grease two 22cm round cake tins. To make the cake batter, sift flour into a bowl and add wattleseed powder, baking soda and salt, then mix until well combined. In another bowl, combine yoghurt, tangelo juice and zest and vanilla. Add the butter and sugar to a third bowl, and beat until light and fluffy using an electric mixer. Alternate adding the yoghurt mixture, the flour mixture and the beaten egg to the butter mixture. Beat until well combined. Pour the batter into the prepared tins and bake for 50 to 55 minutes, or until a skewer inserted into the middle of the cake comes out clean.
While the cakes are baking, make the tangelo syrup. Place the strained tangelo juice, lemon juice and caster sugar in a small saucepan. Stir over
a low heat until the sugar has dissolved. Bring to a simmer for 4 minutes
or until a syrup forms.
Remove the cakes from the oven and, using a skewer, prick multiple holes in the top while they’re still warm. Drizzle the syrup evenly over the cakes, and allow to cool completely. You can then refrigerate the cakes for 4 to 6 hours prior to frosting. This step is optional, but refrigerated or even frozen cake layers are much easier to work with. I recommend this step to ensure that crumbs don’t break off into the icing, but if time doesn’t allow, just go slowly and carefully.
For the buttercream icing, combine butter, icing sugar, cream cheese, mascarpone, milk and vanilla bean paste and beat until smooth. Set aside.
Remove the cakes from the fridge. Level the tops with a serrated knife (or cake leveller, if you have one) to ensure a flat surface. Place a dollop of icing in the centre of your serving plate or cake stand (to stop the cake from sliding) and place the first cake layer on top of the icing. Spoon 1 cup of icing directly on top of the first layer and then, using an offset spatula, spread it evenly over the top and just past the edges. Place the second cake layer upside down on top of the first layer, giving you a lovely flat surface to decorate. Spoon the remaining icing directly on top and lightly frost the entire cake – starting with the top and moving down the sides, leaving the layers largely exposed.
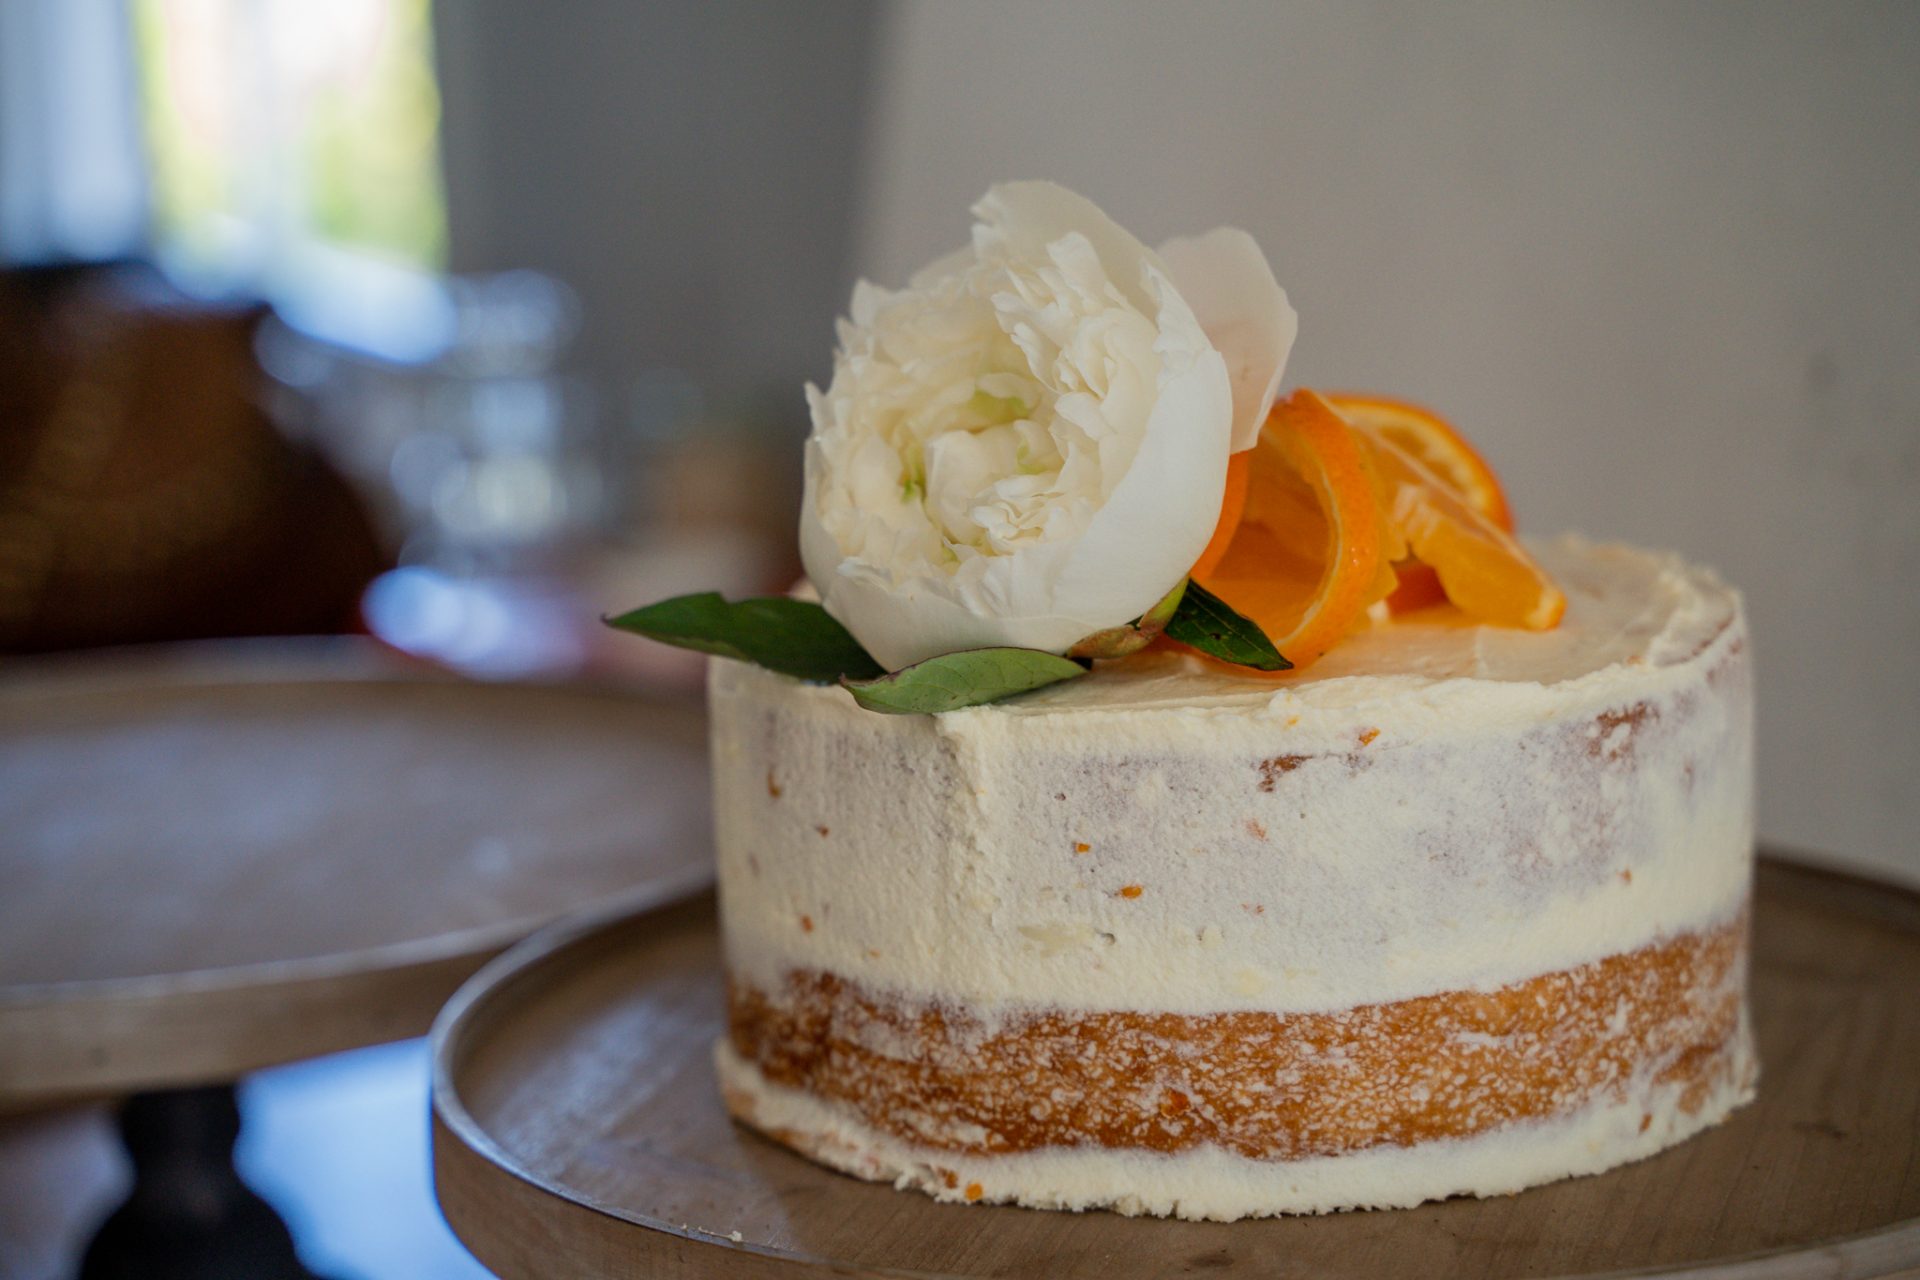
Chill your cake in the refrigerator for a few hours before serving to help the frosting adhere to the sides of the cake, as well as ensuring a neater slice, and then set it out at room temperature for your party or celebration. Decorate with a cut tangelo and a pesticide-free, edible flower of your choice – we used a peony.
Recipe and styling: Lyndel Miller, Photography: Mindi Cooke. Top image: Kelley Sheenan. Created in collaboration with Lighthouse Baking.